

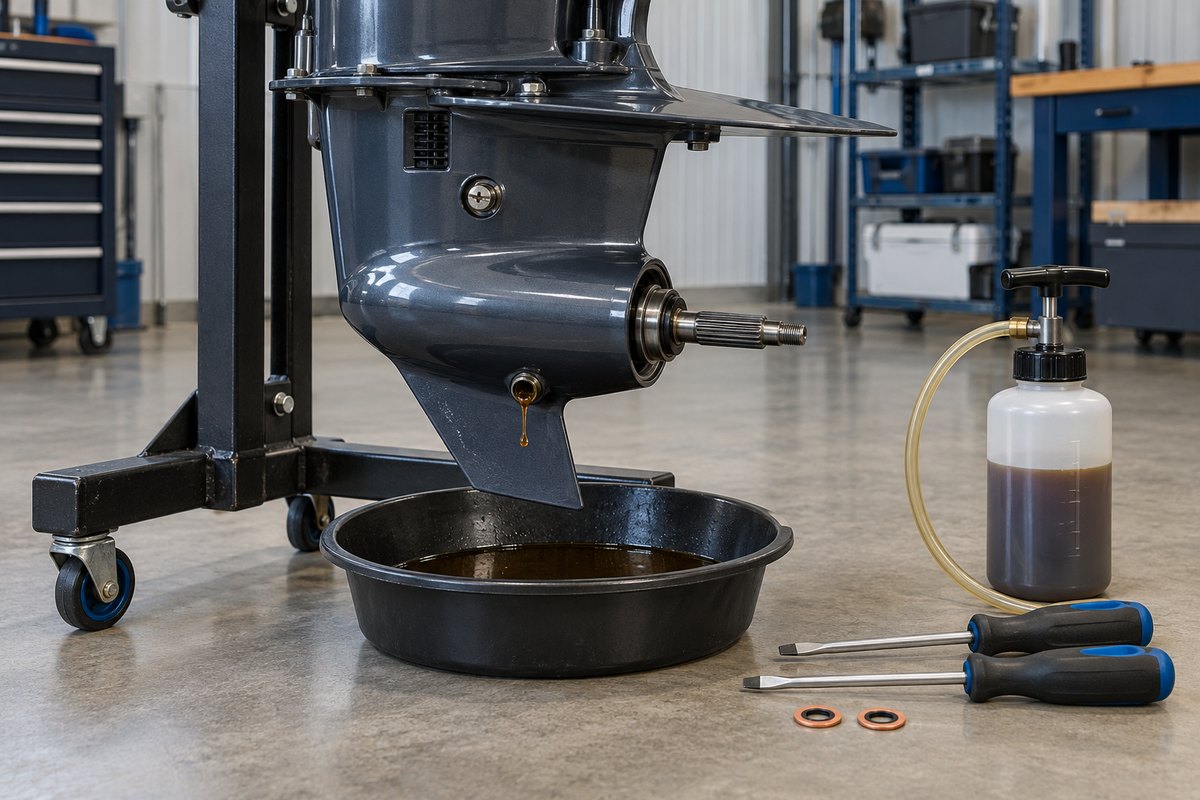
An outboard lower-unit gear-lube inspection before winter storage does more than replace old oil. Draining the lubricant gives you a direct look at what has been circulating around the gears, bearings, and shafts. Water, abnormal metal, a damaged plug seal, or badly degraded lubricant can reveal a problem while there is still time to investigate it—rather than after a winter freeze or during the first launch of spring.
The general workflow is similar across many outboards, but lubricant type, drain-plug arrangement, engine position, fill direction, capacity, sealing washers, and torque values are not universal. Use the operation and maintenance manual for the exact engine model and serial-number range. If the drained lubricant suggests water entry or internal damage, filling the gearcase with new oil is not a complete diagnosis.
Why End-of-Season Gear-Lube Service Matters
Gearcase lubricant works under high pressure while the lower unit is submerged. It must protect gears and bearings while resisting foaming, shear, and corrosion. Over a season it can accumulate wear material, lose additive performance, or become contaminated.
Mercury advises changing engine oil and gear lube at the end of the season rather than storing the drive with used lubricant and accumulated contaminants. Mercury also cautions against leaving a lower unit empty during storage because moisture and air can promote rust on gears, bearings, and shafts. Yamaha recommends model-specific interval service and emphasizes inspecting the drained lubricant for water and abnormal metal.
This makes the storage service both preventive maintenance and a condition check: drain, observe, investigate anything abnormal, then refill correctly.
Gather the Exact Specifications First
Before loosening a plug, confirm these items in the owner’s manual:
- Approved marine gear-lube specification
- Service interval and whether an initial break-in change applies
- Gearcase capacity for the exact model
- Location and number of drain, fill, and vent plugs
- Required engine position during draining and filling
- Direction of filling and the correct fill-level indication
- New plug gaskets, O-rings, or sealing washers required
- Plug-tightening torque and any special procedure
Do not select lubricant by viscosity alone. Yamaha advises using a marine gearcase formula rather than automotive or tractor gear oil. Mercury specifies different gear lubricants for certain outboard horsepower ranges and recommends consulting the applicable manual. Mixing incompatible or unapproved products can undermine the very protection the service is meant to restore.
Gather a clean drain pan, the correct screwdrivers or drivers, a calibrated torque wrench where specified, a gear-lube pump or manufacturer-approved container, new seals for every opened plug, gloves, absorbent material, and a clean transparent sample container. Have enough lubricant to fill the entire gearcase, including normal service loss.
Let the Lower Unit Settle Before Sampling
Freshly operated gear lube may contain tiny air bubbles that make it look cloudy. Yamaha cautions that running the outboard immediately before checking the lubricant can agitate trapped air and create an appearance that might be confused with water contamination. Mercury likewise notes that recently operated lubricant may look yellowish from aeration.
Position the outboard as the manual directs and allow the oil to settle. Clean around each plug so dirt cannot fall into the gearcase. Place the drain pan before loosening anything, and keep the used-oil stream where you can see the first fluid that exits.
If you only crack a lower plug to take a condition sample, follow the exact manufacturer procedure and replace its seal as required. For scheduled storage service, a complete drain and refill normally provides a clearer inspection and removes old lubricant rather than mixing it with new.
Examine the Drained Lubricant Carefully
Use good lighting and a clean container. Observe color, consistency, odor, separated water, and particles without assuming that any single appearance proves the cause.
Milky, creamy, or separated water
A persistent milky appearance can indicate water mixed into the lubricant. Free water may also separate to the bottom of a clear sample after it rests. However, aeration and some assembly lubricants can temporarily produce a lighter appearance. Let a sample settle and compare your observation with the manufacturer’s guidance.
If water is present or strongly suspected, stop treating the job as a routine oil change. Yamaha recommends a dealer pressure test and seal inspection. Mercury also calls for dealer inspection when water is found and identifies pressure testing as part of the diagnostic process. A damaged shaft seal, plug seal, O-ring, water-pump-area gasket, or sealing surface may be involved.
Fine metallic paste versus chips
Magnetic plugs often collect a fine gray paste or powder from normal wear. Large flakes, sharp fragments, chips, or an unusual increase from the prior service are different. Yamaha says larger chips warrant dealer inspection for possible internal damage. Mercury similarly distinguishes normal fine particles from chips that require gear-housing disassembly and component inspection.
Do not wipe the evidence away before documenting it. Photograph the plug and drain pan, note the engine hours, and keep a clean sample if a technician may need to see it.
Burnt odor or severely darkened oil
A burnt smell or badly degraded lubricant can point to overheating, excessive load, wrong lubricant, extended service, or internal distress. Appearance alone does not identify the failed part, but it is reason to compare the service history and obtain a professional opinion before the next trip.
Inspect the Plugs and Sealing Surfaces
Clean each plug without damaging a magnet or threads. Check for:
- Rounded or damaged driver recesses
- Distorted threads
- Corrosion on the plug or gearcase seat
- A sealing washer stuck to the housing
- Cuts, flattening, or hardening in reusable-type O-rings, where applicable
- Metal accumulation that differs from prior services
Yamaha directs owners to discard and replace the small crush washer on each opened drain or vent screw and warns that reused washers are a common path for water intrusion. Other designs use different seals. Install exactly the new gasket, washer, or O-ring listed for your model; do not substitute a hardware-store washer or add thread sealant unless the manual specifies it.
If a plug thread is damaged or the sealing seat is pitted, do not rely on extra torque to make it seal. Excess torque can damage the housing. Have the threads and seat evaluated.
Refill From the Correct Point
Many outboards are filled from the lower opening until new lubricant reaches an upper vent or level opening. This bottom-up method helps push air out of the gearcase. It is common, but it is not permission to ignore the manual. Some gearcases have multiple vents, special adapters, model-specific sequences, or different level checks.
For a typical bottom-fill procedure:
- Place the outboard in the specified position.
- Connect the approved pump or fill fitting to the lower opening.
- Pump slowly so air can escape rather than becoming trapped.
- Watch the correct upper opening for clean lubricant as directed.
- Pause or continue pumping if the manual specifies a settling step.
- Install the upper plug with a new seal while the fill connection remains in place, if directed.
- Remove the fill connection and install the lower plug promptly with a new seal.
- Tighten each plug to the published specification with the correct tool.
Tohatsu warns that running an outboard without completely filling the lower unit to the proper level can cause severe damage. Do not estimate fullness from the amount used alone. Verify the level by the model’s specified indication or check procedure.
Clean, Recheck, and Watch for Leaks
Wipe the housing completely clean after filling. Record the product and approximate quantity used, but remember that published capacities can vary by model and some lubricant is lost during connection changes.
Inspect around the plugs immediately, then again after the unit has rested. A wet ring may be leftover oil, so clean and recheck. Persistent seepage requires correction before operation. Verify that each plug has the correct seal and torque; do not simply tighten beyond specification.
If the gearcase failed a pressure or vacuum test, do not launch merely because it contains fresh lubricant. The source of water entry must be repaired and the unit filled again according to the service procedure.
What Not to Do
- Do not leave the gearcase empty for winter storage.
- Do not reuse a one-time sealing washer.
- Do not add an unapproved lubricant because its viscosity seems similar.
- Do not confuse temporary aeration with confirmed water intrusion—or dismiss water without testing.
- Do not ignore metal chips because the lower unit was still operating normally.
- Do not use excessive plug torque to compensate for a damaged seal or thread.
- Do not run the outboard to “test” the fill unless cooling water and the manufacturer’s post-service procedure are provided.
- Do not perform a pressure test with improvised pressure or an unknown limit; excess pressure can damage seals.
Lower-Unit Gear-Lube Storage Checklist
- Identify the exact outboard model, serial range, lubricant, capacity, and service interval
- Obtain the correct new plug seals and fill adapter
- Position the engine and let the lubricant settle as directed
- Clean around drain, fill, and vent plugs
- Drain into a clean pan and inspect the first fluid leaving the case
- Check for separated water, persistent milkiness, burnt odor, and abnormal metal
- Photograph unusual findings before cleaning the magnetic plug
- Inspect plug threads, sealing seats, and removed seals
- Arrange pressure testing or internal inspection when evidence warrants it
- Refill through the correct opening using the approved marine lubricant
- Install new seals and torque plugs to the model-specific specification
- Clean the housing and recheck for seepage after it rests
- Recycle used lubricant properly
Record the Service in BoatDuty
A useful lower-unit record includes the date, engine hours, lubricant brand and exact specification, plug-seal part numbers, approximate amount added, and plug torque from the manual. Note whether the old oil was clear, dark, aerated, milky, burnt smelling, or carrying metal—and attach photos when the appearance is unusual.
If a dealer performs a pressure test or seal repair, record the findings and replaced components. That history makes future oil inspections much more meaningful. A small amount of fine paste may be normal for one gearcase, but a sudden change is easier to recognize when prior observations are available.
Spring Recommissioning Check
Before spring launch, inspect the lower unit and both plug areas for seepage. Confirm that the winter service was completed and that any water-intrusion or metal finding was resolved, not merely noted. If the gearcase was repaired, follow the technician’s break-in or early recheck recommendation. Start the season with a verified full gearcase rather than assuming that a clean exterior guarantees the oil remained inside.