

A marine sanitation macerator pump may sit unused for months and then be expected to move a holding tank’s contents through a cutter, flexible impeller, discharge hose, and overboard plumbing without leaking or clogging. That long idle period is hard on rubber components, seals, electrical connections, and any trapped liquid exposed to freezing temperatures.
End-of-season service should leave the tank properly emptied, the pump and hoses clean, the legal discharge path secured, and the system protected according to the boatbuilder and equipment manuals. This article focuses on holding-tank discharge macerators. Macerating toilets, vacuum generators, fish-box pumps, and treatment systems can look similar but have different procedures.
Begin With Legal and Environmental Compliance
Do not operate an overboard sanitation pump simply because it needs testing. U.S. Environmental Protection Agency guidance explains that no-discharge zones prohibit both treated and untreated vessel sewage discharge. EPA’s recreational-boater guidance directs owners to retain sewage for lawful offshore disposal or use an onshore pump-out facility; state and local rules can be stricter.
Before service:
- confirm the boat’s location and applicable discharge rules;
- use an approved pump-out facility to empty the holding tank;
- close and secure the overboard-discharge seacock or valve as required;
- arrange lawful capture or disposal for any liquid displaced during service; and
- wear protective equipment appropriate for sanitation work.
Never discharge sewage, flush water, cleaner, or antifreeze into a marina, storage yard, or prohibited water. If the winterization procedure normally sends liquid toward an overboard outlet, coordinate an approved capture method or have the yard perform the work.
Identify the Pump and Plumbing Layout
Record the pump manufacturer, model, voltage, fuse or breaker rating, service-kit number, and installation orientation. Trace the entire route before disconnecting anything:
- holding-tank outlet;
- maintenance valve, Y-valve, or tee to the deck pump-out;
- macerator inlet;
- pump discharge;
- vented loop where required;
- seacock or discharge valve; and
- overboard through-hull.
Photograph valve positions and hose routing. Label hoses and wires if the markings are unclear. Not every system uses every component, and a below-waterline discharge requires model- and installation-specific anti-siphon protection.
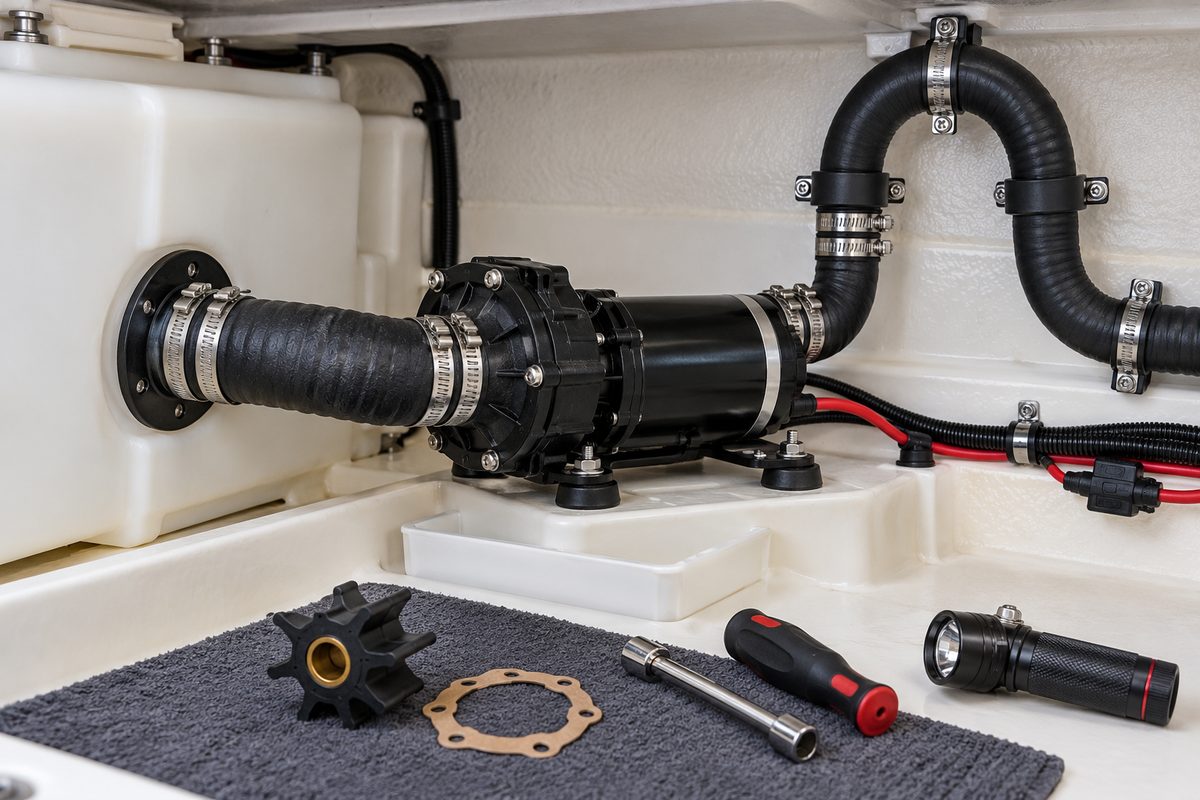
The Jabsco 18590-series manual is a useful example of pump construction: a self-priming flexible impeller, stainless wear plate, cutter, lip seal, and permanent-magnet motor. Its inlet and outlet sizes, current draw, dry-running limits, fuse size, and duty cycle are model-specific; do not copy those values to another pump.
Pump Out and Rinse the Holding Tank
Empty the tank at a lawful pump-out station. Follow the tank maker’s rinse procedure rather than repeatedly filling an unknown tank to the top. A clear rinse does not prove that every low point or pump cavity is clean, but removing sediment reduces blockage and odor during storage.
Jabsco recommends flushing a holding tank with several gallons of water after pump-out to reduce sediment buildup for its 18590-series applications. Dometic likewise calls for thoroughly flushing applicable holding-tank systems with fresh water before adding approved propylene-glycol antifreeze.
Do not add bleach, caustic drain cleaner, petroleum solvent, or an aggressive deodorizer unless every sanitation component manufacturer approves it. Chemicals that attack a hose, O-ring, impeller, tank fitting, or sensor can create an expensive leak.
If the tank cannot be emptied or rinsed normally, stop and diagnose the blockage rather than running the macerator dry or pressurizing the tank.
Isolate Power and Close the Seacock
After the permitted operational steps are complete:
- switch off the macerator circuit;
- remove the fuse or apply lockout where practical;
- verify the pump cannot start from a remote switch;
- close the overboard seacock or discharge valve;
- secure a Y-valve in the lawful position if required; and
- relieve retained pressure carefully.
A sanitation system can contain trapped liquid even after pump-out. Place a catch pan and absorbent materials under service points. Open fittings slowly and keep caps or plugs ready.
Do not work on the pump with power connected. The cutter and flexible impeller can injure fingers if the motor starts unexpectedly.
Inspect the Pump Body and Mounting
Clean the outside of the pump with products approved for the materials, then inspect under good light. Look for:
- cracks in the pump head or cutter housing;
- leakage at the shaft seal, body joint, inlet, or discharge;
- rust trails, salt deposits, staining, or dried waste residue;
- a swollen or blistered motor coating;
- damaged rubber mounting grommets;
- loose fasteners or a base that flexes;
- contact between the motor and standing water;
- corrosion at the motor end bells or shaft; and
- a missing rear shaft cap or other service cover.
The pump should be supported by its mounting system, not by rigid hose tension. On Jabsco’s 18590 series, vertical mounting is permitted but the manufacturer recommends placing the pump head below the motor. Other pumps may differ.
A leaking shaft seal can contaminate and corrode the motor. Replacing only the visible gasket may not correct that failure.
Inspect Sanitation Hoses, Clamps, and Valves
Follow the suction and discharge hoses by hand and sight. Check for soft spots, cracks, flattened bends, kinks, abrasion, odor permeation, unsupported weight, or hose that has pulled partly off a barb. Verify that clamps are marine-grade, correctly positioned over the barb, accessible, and free from perforation-band corrosion or broken housings.
Double clamps may be appropriate at certain below-waterline or sanitation connections when the fitting provides enough barb length; two poorly positioned clamps are not safer than one correct connection. Follow the boat and component manuals.
Operate accessible maintenance valves and the Y-valve through their full travel only after confirming that doing so cannot create an illegal discharge or admit seawater. A seized handle, vague detent, cracked body, or leaking stem needs repair before storage.
Inspect the vented loop, if fitted, for correct height at every expected heel or trim angle, hose support, and a clean valve or air inlet. Do not plug an anti-siphon vent to stop an odor or drip; diagnose why it is leaking.
Check the Electrical Circuit Under Load
Before final winterization, a lawful brief operational test can reveal electrical trouble. Use the exact manual’s procedure and keep the system supplied with liquid so the pump does not run dry.
Listen for a smooth motor tone and note how quickly the pump primes. Measure voltage at the pump while it runs, if access is safe, and compare current draw only with the manufacturer’s published range for that operating condition. Low voltage can make a motor slow and hot; excessive current can indicate a bound impeller, obstruction, cutter damage, bearing trouble, or incorrect wiring.
Inspect:
- fuse or breaker type and rating;
- conductor gauge for the complete circuit length;
- sealed crimp connections and heat-shrink;
- chafe protection and cable support;
- switch condition and labeling; and
- motor-ground or negative connection.
Do not install a larger fuse to cure nuisance opening. The Jabsco 18590 manual, for example, specifies different fuse sizes for its 12- and 24-volt versions. Protection must match the actual model and wiring.
Do Not Ignore Noise or Loss of Prime
A pump that runs but does not move liquid may have an air leak on the suction side, a loose deck-pump-out cap in a tee arrangement, a closed valve, restricted hose, worn impeller, blocked cutter, or excessive lift. Jabsco notes that airtight suction connections are necessary for proper priming.
Unusually loud operation or repeated breaker trips warrants shutdown. Do not continue cycling the pump in hopes that debris will clear. Rags, wet wipes, tampons, sanitary products, and paper towels can damage or jam common cutters and impellers even when marketed as “flushable” for household plumbing.
If the rear shaft slot is intended for manual impeller release, use it only as described by the pump manual with power isolated. Never grip or turn the exposed cutter.
Service the Flexible Impeller and Cutter Correctly
Some manufacturers provide a complete service kit containing the flexible impeller, gaskets, pump body or seal, and wear components. Use the kit specified for the exact pump revision.
Before disassembly:
- isolate power and verify it is off;
- close valves and capture residual liquid;
- mark housing orientation;
- photograph gasket and wear-plate order;
- use the stated tools and fastener sequence; and
- obtain published torque values.
Inspect the old impeller for cracked, permanently bent, missing, or hardened vanes. Account for every missing fragment because debris may remain downstream. Examine the cutter and wear plates for corrosion, scoring, deformation, or foreign material. Replace seals, gaskets, and single-use locking hardware as directed.
Do not clamp a plastic pump body in a vise or pry against a sealing face. Do not substitute household gasket material or an unlisted impeller lubricant. Jabsco’s 18590 instructions specify alignment, thread-locker use, and inch-pound torque values for its parts; another design may be different.
After assembly, perform a controlled leak and function test with clean water before winterizing.
Winterize the Pump and Discharge Path
The goal is to replace freeze-prone water in the pump, valves, and hose low points with the method approved for the system. Procedures vary widely.
Xylem’s Jabsco winter-maintenance guidance describes drawing potable-water-system antifreeze from the holding tank through the macerator for approximately 30 seconds in an applicable installation. Dometic instructs owners of certain holding-tank systems to flush with fresh water first and use propylene-glycol freshwater antifreeze without alcohol. These directions are examples, not a universal recipe.
Follow the exact manuals for:
- antifreeze type and whether alcohol is prohibited;
- required concentration for the lowest expected temperature;
- quantity needed to reach all branches and low points;
- valve positions and capture or disposal arrangement;
- permitted run time and dry-run limit; and
- whether hoses, pump chambers, or seacocks should instead be drained.
Automotive ethylene-glycol antifreeze is not appropriate for this work. Do not pour antifreeze into a holding tank and discharge it overboard without confirming that the act is lawful and environmentally acceptable. At a marina or yard, route the discharge to an approved collection container or pump-out system.
When the procedure is complete, close and secure the overboard valve, leave the Y-valve in the required position, remove power from the macerator, and tag the controls with the storage configuration.
Storage and Spring Recommissioning
During storage, keep the compartment dry and ventilated. Inspect periodically for leaks, odor, freezing damage, rodent activity, or a displaced hose. Do not stack gear against the pump or valves.
In spring:
- inspect the pump, hoses, clamps, valves, and through-hull before restoring power;
- confirm the seacock operates correctly while the boat is accessible;
- restore the lawful valve configuration;
- flush and dispose of antifreeze according to the manuals and local rules;
- reinstall the specified fuse and remove lockout tags;
- test with clean water while checking every joint for leaks;
- verify voltage, current, priming, flow, noise, and automatic dry-run protection if fitted; and
- secure the overboard-discharge control after the test.
Do not wait until the holding tank is full to discover that the pump has a stuck impeller or leaking discharge hose.
Marine Macerator Pump Maintenance Checklist
- Confirm local sewage-discharge rules and use an approved pump-out.
- Identify the pump, voltage, service kit, fuse, and plumbing diagram.
- Empty and fresh-water rinse the holding tank as directed.
- Isolate electrical power and close the overboard seacock.
- Inspect the pump body, seals, motor, grommets, and mounting.
- Check hoses, supports, clamps, Y-valves, and vented loops.
- Perform only a lawful, liquid-supplied operational test.
- Record running voltage, current, prime time, sound, and leaks.
- Diagnose no-flow, high-current, or abnormal-noise conditions.
- Service the impeller and cutter only with the correct manual and kit.
- Use only the approved winterization fluid and concentration.
- Capture and dispose of service liquid lawfully.
- Secure the discharge valve and tag the stored configuration.
- Recommission with clean water and a full leak check.
Record the Work in BoatDuty
Create a BoatDuty entry with the pump manufacturer, model, voltage, service-kit number, fuse rating, tank and hose configuration, valve positions, pump-out and rinse date, running voltage and current, priming behavior, impeller and seal condition, parts replaced, antifreeze product and concentration, quantity used, and storage configuration. At recommissioning, add the flush date, leak-test results, and any repairs. A precise record makes it easier to separate normal flexible-impeller aging from a developing electrical or plumbing restriction.
Sources
- Xylem/Jabsco, Macerator Pump With Run-Dry Protection—Model 18590-Series Instructions Manual
- Xylem/Jabsco, Expert Winter Maintenance Tips for Jabsco Pumps and Marine Toilets
- Dometic, HTS-VG, HTS-T, HTS-Basic Series Holding Tanks Installation and Operation Manual
- Dometic, DHT-L Series Holding Tank Installation and Operation Manual
- U.S. EPA, Vessel Sewage No-Discharge Zones
- U.S. EPA, Marine Sanitation Devices
- U.S. EPA, A Recreational Boater’s Guide to Vessel Sewage