

A marine high-water bilge alarm is easy to overlook because, in a healthy boat, it should remain quiet. That silence does not prove the system will work when water rises above the normal bilge-pump level. An end-of-season inspection gives you a controlled opportunity to clean the sensor, check its mounting and wiring, and confirm that the alarm can be heard and seen before the boat is stored or left unattended.
This guide covers dedicated high-water alarms, alarm functions built into bilge monitors, and systems that report to a multifunction display or vessel-monitoring network. Not every boat has every component. Follow the wiring diagram and test procedure for the exact sensor, panel, and monitor installed on your boat.
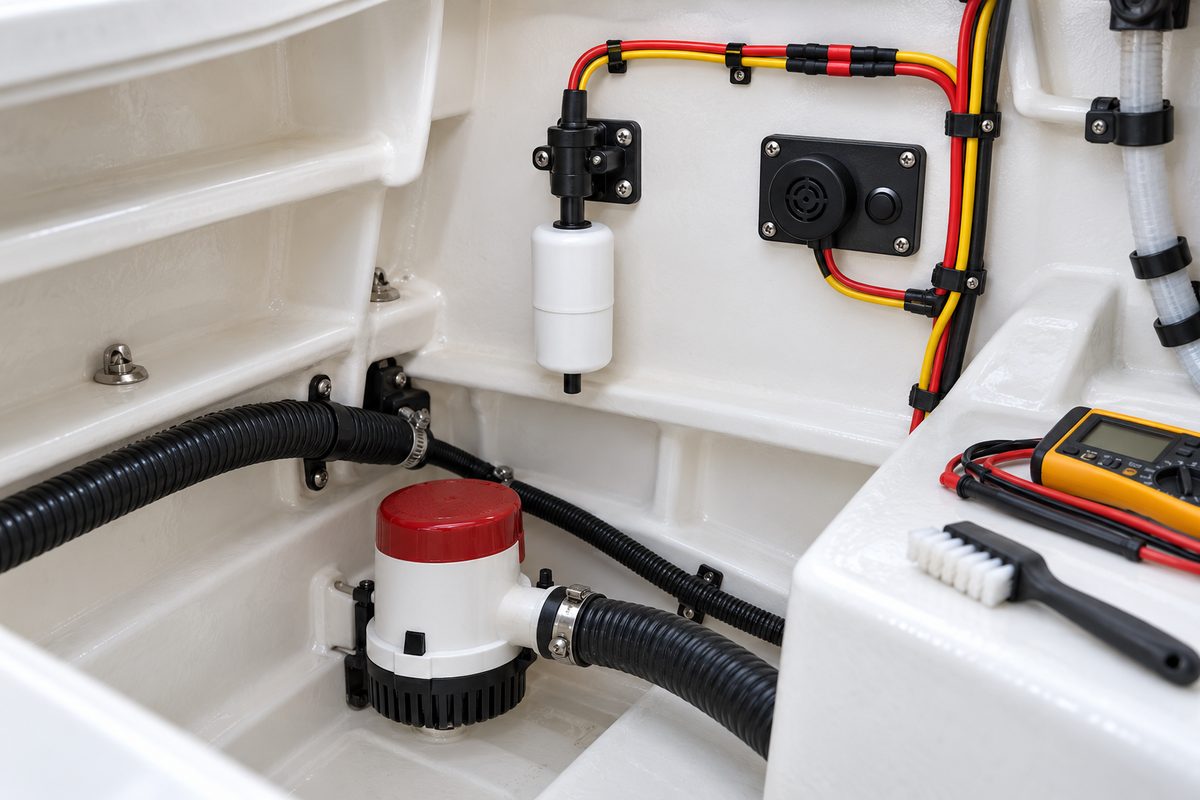
Understand the Difference Between a Bilge Pump Switch and a High-Water Alarm
An automatic bilge pump switch starts a pump at its normal activation level. A high-water alarm should warn that water has risen beyond the level the routine pumping system is expected to control. Some installations use a separate float switch and an audible or visual panel; others use an electronic sensor or monitor inputs from several bilge compartments.
The distinction matters during testing. Operating the pump's float switch proves only that the pump circuit responds. It does not necessarily test the alarm sensor, buzzer, indicator, relay, network message, or notification path.
Before beginning, identify:
- every compartment monitored for high water;
- the alarm sensor associated with each compartment;
- the local buzzer, light, display, or monitoring module;
- the circuit protection and power source;
- any mute, acknowledge, test, or reset control; and
- any remote display or connected monitoring system that should receive the alarm.
If the installation cannot be traced confidently, use the equipment manuals or have a qualified marine electrician identify the circuit before changing anything.
Start With a Dry, De-Energized Visual Inspection
Inspect the physical system with the relevant circuit de-energized unless the manufacturer directs otherwise. The bilge should be dry enough to see the sensor, supports, terminals, and wire route clearly.
Look first at the sensor's location. A dedicated high-water sensor is normally positioned above the routine pump-switch level, but the correct height and orientation are installation-specific. It must be secure, reachable by rising water, and clear of hoses, cables, debris, and moving equipment. A loose bracket or rotated switch can change the activation level or prevent a float from moving.
Check for:
- oil film, hair, leaves, sludge, or other debris around the sensing mechanism;
- a float that is cracked, waterlogged, distorted, or obstructed;
- an electronic sensor face coated with residue;
- loose screws, cracked brackets, or failed adhesive mounts;
- wiring that can snag a moving float;
- chafe where conductors cross structure or machinery;
- unsupported splices lying in the bottom of the bilge;
- green corrosion, swollen insulation, or heat discoloration; and
- recent modifications that may have moved a hose or cable into the sensor's path.
Clean only with products and methods approved for the device. Harsh solvent, aggressive brushing, or pressure washing can damage seals, plastics, or electronics. Do not coat a sensing surface with grease or corrosion spray unless its manufacturer specifically permits it.
Inspect Bilge Wiring and Circuit Protection
Bilge spaces expose wiring to moisture, vibration, cleaning chemicals, and accidental contact with stored gear. Alarm wiring should be supported, protected from abrasion, and joined with marine-suitable sealed connections. No bare conductor should be visible, and no splice should be left where standing water can submerge it.
Trace the circuit as far as practical and compare it with the installed diagram. Confirm that the correct fuse or breaker is present and that its rating matches the equipment instructions and conductor size. Do not increase a fuse size to stop nuisance openings; that can leave the conductor unprotected.
Some high-water alarms are wired to remain available when a main battery switch is off. Others are supplied by a monitored distribution panel or are integrated into a larger vessel system. Do not assume that one arrangement applies to every boat. Record how your system is intended to receive power, then verify that the actual wiring matches the manual.
At the panel or monitor, inspect rear terminals only after safely isolating the circuit. Look for loose hardware, corrosion, strain on small conductors, missing terminal protection, and water tracks behind the panel. If torque values are published, use them; do not guess or tighten small terminals by feel until they deform.
Test the Sensor and the Complete Alarm Path
Restore power and use the manufacturer's test method. For a mechanical float, that may mean lifting or rotating the float through its full travel. An electronic sensor may require water, a built-in test feature, or a specified test procedure. Never short wires together merely to make the buzzer sound unless the manual explicitly calls for that method.
A complete functional test should verify more than a click at the sensor:
- Activate the correct sensor using the approved method.
- Confirm the local audible alarm sounds.
- Confirm the warning light or display identifies the proper bilge zone.
- Check any remote display, external relay, or connected monitoring output that is part of the installation.
- Operate the acknowledge or mute control, if fitted, and confirm that the warning indication behaves as described in the manual.
- Return the sensor to normal and verify that the alarm clears or resets correctly.
- Repeat the test for every monitored compartment.
Test from normal operating and sleeping locations when practical. A buzzer that works behind a closed machinery hatch may still be difficult to hear elsewhere on the boat. Do not relocate or add an alarm device without confirming its electrical compatibility and circuit requirements.
If a multi-bilge monitor records pump cycles or run time, confirm that the displayed zone and event data are credible. Incorrect zone labels can send someone to the wrong compartment during an emergency.
Use a Controlled Water Test Only When Appropriate
Moving a float manually confirms much of the electrical path, but it does not always prove that rising water will reach the sensor at the intended level. A controlled water test can reveal a poor location, trapped air, an obstructed float, or a mounting angle that prevents activation.
Only add water when the boat's configuration, storage situation, temperature, and manufacturer guidance make it safe. Keep water away from unsealed electrical equipment, and never leave the boat during the test. Observe the normal pump first, then verify that the high-water alarm activates at the intended higher level if the procedure allows it. Remove the test water completely afterward and investigate any pump, hose, or discharge problem revealed by the test.
Do not conduct a water test where freezing conditions could leave water trapped in the bilge, pump, hose, or check valve. A dry functional test is preferable when complete drainage cannot be guaranteed.
Diagnose Common High-Water Alarm Problems Methodically
If the alarm does not operate, avoid replacing parts at random. Work through the circuit with the correct diagram and a digital multimeter.
No Alarm When the Sensor Is Activated
Check the fuse or breaker, supply voltage, ground return, sensor output, panel connection, and alarm device in that order. A failed sensor is possible, but so are a corroded splice, poor ground, disconnected buzzer, or disabled monitor input.
Alarm Sounds Intermittently
Look for a loose sensor, chafed wire, contaminated float, water sloshing at the activation height, or a connector that opens with vibration. An intermittent alarm may be reporting a real but temporary high-water condition, so inspect the compartment and pumping system before treating it as an electrical nuisance.
Alarm Will Not Clear
Confirm that the float or sensor has returned to its normal state, that debris is not holding it active, and that the monitor does not require an acknowledge or reset command. Do not permanently silence or bypass the alarm to stop the sound.
Alarm Works Locally but Not Remotely
Inspect the relay output, network connection, monitor configuration, zone assignment, and any external notification device. A local alarm and a remote alert are separate links in the warning chain.
Prepare the Alarm for Storage or Unattended Periods
For a boat remaining in the water, a working high-water alarm is especially important. Leave the system powered exactly as the approved installation requires, and confirm that battery capacity, charging arrangements, and remote-monitoring assumptions are realistic.
For a boat stored ashore, clean and dry the sensor area, drain every bilge pocket that can hold water, and protect wiring from stored gear and service traffic. Do not disconnect the alarm simply because the boat is out of the water; rainwater, failed covers, plumbing leaks, and blocked drains can still create a high-water condition on some boats.
If batteries will be removed, note that the alarm will be unavailable. Record the disabled period and restore the system during recommissioning. Do not describe the boat as monitored while its alarm power source is absent.
High-Water Bilge Alarm Maintenance Checklist
- Identify every sensor, monitored compartment, alarm device, and power source.
- Compare the installation with the current equipment manuals.
- Dry the bilge and remove debris around each sensor.
- Confirm that each sensor is secure, correctly oriented, and unobstructed.
- Inspect wiring support, chafe protection, sealed splices, and terminal condition.
- Verify the specified fuse or breaker and correct any unexplained opening.
- Test each sensor using the manufacturer-approved method.
- Confirm audible, visual, zone, relay, network, and remote outputs that apply.
- Verify mute, acknowledge, reset, and alarm-clear behavior.
- Complete a controlled water test only when safe and appropriate.
- Drain and dry the compartment before freezing weather or storage.
- Repair any fault before relying on the alarm.
Record the Work in BoatDuty
Log the inspection date, battery condition, sensor model, circuit-protection rating, compartments tested, and results in BoatDuty. Note whether the test was manual or water-activated, which local and remote warnings operated, and any wiring or mounting repair completed. A short record makes it easier to detect repeat faults and to prove that every zone—not merely the easiest sensor to reach—was tested.
A high-water alarm is a warning system, not a substitute for sound pumps, hoses, through-hulls, and routine bilge inspections. Its maintenance value comes from testing the complete path before an actual rising-water event has to do it for you.
Sources
- Xylem Rule, bilge-pump float switches and high-water alarm product information
- Xylem Rule, Rule-A-Matic float-switch technical data and testing guidance
- Blue Sea Systems, M2 OLED Digital Bilge Meter product information
- Blue Sea Systems, product instruction library including the M2 OLED Bilge Monitor
- Xylem Rule, guidance for sealing bilge-pump wiring connections