

The hydraulic surge-brake actuator on a boat trailer does more than connect the coupler to the tow vehicle. As the tow vehicle slows, the actuator’s sliding mechanism applies pressure to the trailer’s hydraulic brakes. Saltwater, road spray, long storage, and repeated launch ramps make a careful boat-trailer surge-brake actuator inspection especially valuable before winter layup and before the next towing season.
Actuator designs are not interchangeable. Disc- and drum-brake models can use different master cylinders, travel, lockout arrangements, brake fluids, and service procedures. Identify the actuator by manufacturer and model, then use its current owner’s manual for fluid specification, lubrication points, adjustment, bleeding, replacement parts, capacity, and testing. Do not infer any of those details from appearance alone.
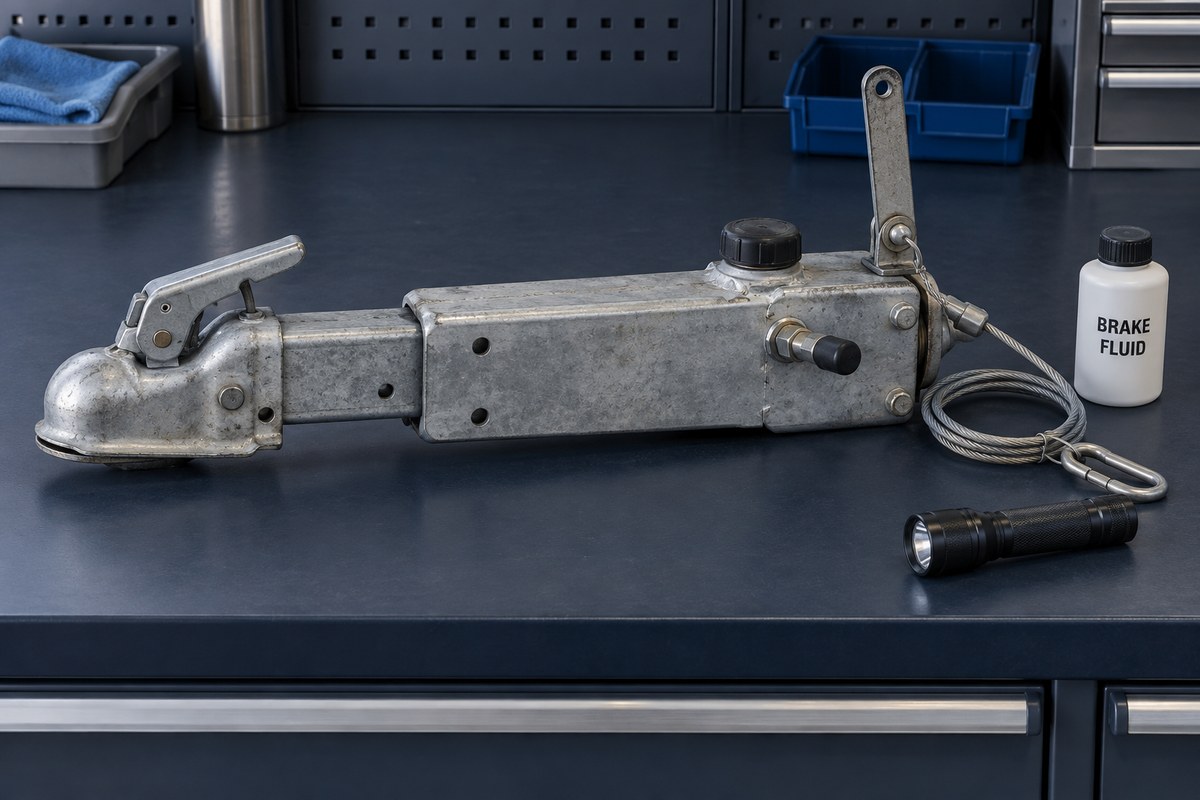
Stabilize the trailer before inspection
Park on firm, level ground, chock the wheels, disconnect the trailer plug as needed for the work, and support the tongue with a rated jack or stand. The actuator and coupler must not be carrying an unstable load. Wear eye protection around hydraulic fluid and springs, and protect painted surfaces because brake fluid can damage finishes.
If the trailer has just been towed, allow the brakes and hubs to cool. Do not crawl under a trailer supported only by a tongue jack. Any road test should occur only after the static inspection is complete, with the boat secured, the coupler latched, safety chains connected, the breakaway cable correctly attached, and traffic conditions suitable.
Identify the actuator and brake type
Find the model label, capacity markings, and manual before opening the reservoir or ordering parts. Record whether the trailer has hydraulic disc or drum brakes and whether the actuator uses a manual reverse lockout, an electric reverse-lockout solenoid, or another arrangement. A previous owner may have changed the brakes without changing the actuator, so verify that the components form an approved, compatible system.
Capacity matters as well. The coupler, actuator, ball, trailer, and tow vehicle must all be correctly matched, but this inspection is not a substitute for confirming the complete towing setup and loaded trailer weight.
Inspect the coupler and sliding mechanism
Clean away salt and grit so defects are visible. Examine the coupler socket, latch, safety pin or secondary lock, mounting hardware, welds, and actuator housing. Look for cracks, bent parts, elongated holes, loose fasteners, severe corrosion, and metal-to-metal scoring. A coupler that will not latch positively on the correct-size ball, or one with visible structural damage, should be removed from service until repaired or replaced as the manufacturer directs.
The actuator’s inner member should move through its designed range without binding, excessive looseness, or a harsh catch. Do not use a vehicle to hammer a stuck actuator free. Follow the manual’s method for checking movement, and lubricate only the identified points with the specified product. Grease in the wrong place can retain grit, contaminate friction surfaces, or damage incompatible seals.
Check the rubber boot, shock absorber or damper, rollers, pins, and bushings if they are accessible and included in your model. A torn boot, leaking damper, missing retaining hardware, or uneven movement deserves correction before towing.
Check the master-cylinder reservoir correctly
Clean the area around the fill cap before opening it; grit introduced here can travel into the hydraulic system. Follow the manual for trailer attitude and fluid-level position. Use only the brake-fluid type specified by the actuator manufacturer. Do not mix an unidentified fluid with new fluid, substitute general hydraulic oil, or reuse fluid removed during bleeding.
Inspect the fluid rather than judging level alone. Cloudiness, dark contamination, rust-colored residue, or evidence of water calls for service under the manufacturer’s procedure. Because conventional glycol brake fluid absorbs moisture, leaving the cap open invites contamination. Install the correct cap and diaphragm promptly, and replace a damaged seal.
A low reservoir is evidence to investigate, not simply a top-off task. Check the master cylinder, line fittings, flexible hoses, calipers or wheel cylinders, and the backs of the brake assemblies for leakage. Hydraulic braking depends on a sealed system; any leak or unexplained fluid loss requires repair and proper bleeding before the trailer returns to service.
Inspect the breakaway cable and lever
The breakaway device is intended to apply the trailer brakes if the trailer separates from the tow vehicle. Inspect the cable, hook or clip, lever, pivot, and retaining hardware. Replace a frayed, kinked, heavily corroded, stretched, or dragging cable with the correct part. Route it so it cannot loop around the coupler, snag on the tongue, drag on the road, or pull tight during a normal turn.
Do not pull the breakaway lever casually. Some actuator designs require a specific release or reset procedure, and actuating the system may require bleeding or other service if it does not return correctly. Test and reset it exactly as the actuator manual states. Attach the cable to the tow vehicle at the approved point, independently of the safety chains where required by the manufacturer and applicable law.
Check the reverse lockout and electrical lead
Many disc-brake trailers use an electric solenoid so hydraulic pressure does not apply the brakes while backing. Inspect its wire, connector, ground path if applicable, hydraulic fittings, and protective cover. Chafe, corrosion, a loose terminal, or a leaking fitting can turn a working system into a ramp-side problem.
Confirm lockout operation by the manufacturer’s test. A trailer that resists backing may have a failed solenoid, missing reverse-light signal, wiring fault, hydraulic problem, or mechanical brake issue. Do not make a permanent bypass or drive with a manual lockout engaged; correct the cause and restore normal braking.
Include the rest of the hydraulic brake system
An actuator inspection is incomplete if it stops at the tongue. Follow the steel lines and flexible hoses for corrosion, rubbing, kinks, wet fittings, and unsupported sections. Inspect brakes at the wheels according to their manufacturer: disc systems need checks of calipers, slides, pads, rotors, and hoses; drum systems need checks of wheel cylinders, shoes, hardware, drums, and adjustment.
After repair or fluid service, bleed in the sequence and by the method specified for the actuator and brake system. Keep the reservoir from running dry. Brake work directly affects safe stopping; if diagnosis, bleeding, adjustment, or structural repair is outside your experience, use a qualified trailer-brake technician.
Final surge-brake actuator checklist
- Confirm the actuator model, rating, brake type, and correct manual.
- Inspect the coupler, latch, housing, mount, fasteners, and welds.
- Check actuator travel and only the specified lubrication points.
- Clean around the reservoir cap and verify the specified fluid and level.
- Investigate every leak or unexplained drop in fluid.
- Inspect the breakaway cable, lever, routing, and reset condition.
- Test the reverse lockout where fitted.
- Inspect hydraulic lines, hoses, and wheel-end brakes.
- Complete the manufacturer’s static and road tests before normal towing.
Build a useful BoatDuty service record
Record the inspection date, trailer mileage if known, actuator manufacturer and model, brake type, specified fluid, reservoir condition, and the results of coupler, breakaway, and lockout checks. List fluid or parts used and note any leak, corrosion, binding, or repair referral. Adding photographs and a follow-up date to your BoatDuty maintenance history makes the next inspection faster and helps show whether corrosion or fluid condition is changing over time.
A smooth latch and a full reservoir are not enough by themselves. A sound surge-brake system depends on a compatible actuator, free mechanical travel, clean specified fluid, an intact breakaway system, leak-free plumbing, and serviced wheel-end brakes—all verified together before the boat heads back to the ramp.