

Boat trailer lug-nut and wheel-stud maintenance is more precise than giving every nut one last pull with a long wrench. Correct clamping depends on the wheel, stud, nut seat, thread condition, tightening sequence, and manufacturer-specified torque. Fall inspection is a useful time to identify corrosion or mismatched hardware, but the final torque check still belongs on the pre-tow checklist.
This guide addresses the fasteners that clamp a trailer wheel to its hub. It does not cover the spindle nut that sets or retains the hub and bearings. Those parts may sit close together, but their procedures and torque values are not interchangeable. Use the current trailer, axle, hub, and wheel instructions for the specific assembly.
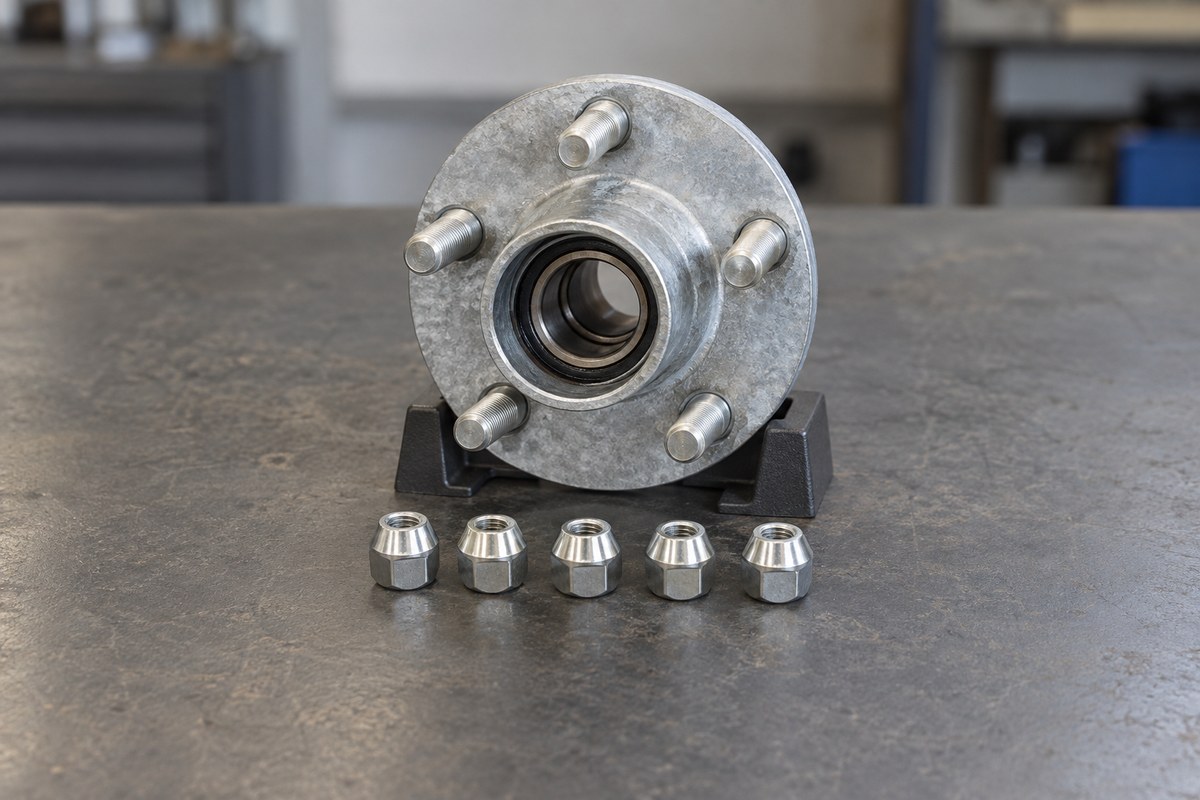
Identify the wheel and fasteners before reaching for a wrench
Record the trailer VIN, axle or hub identification, wheel diameter, wheel material, stud size, bolt pattern, and nut type. Confirm whether the wheel is steel or aluminum and whether the system uses nuts on studs or wheel bolts threaded into the hub.
The shape where the nut meets the wheel matters. Dexter notes that wheel fasteners must match the wheel’s cone angle, and its published torque tables vary by wheel size, stud size, and mounting system. A nut that threads onto the stud is not necessarily correct for the wheel seat. Dexter Wheel Attachment and Torque Requirements
Do not copy a torque value from another trailer or from a generic internet chart. Even manufacturer values can differ between models. Load Rite’s operator manual, for example, lists different ranges for different wheel diameters and stud patterns. Load Rite Trailer Operator’s Manual
If identification is uncertain, stop and obtain the specification from the trailer, axle, hub, or wheel manufacturer. Record the source and revision you relied on so the next service does not begin with the same guess.
Inspect lug nuts and exposed wheel studs
Park on a firm, level surface, secure the tow vehicle, and chock the wheels. If a wheel must be removed, follow the trailer manufacturer’s lifting and support points and use load-rated stands. Never work beneath a trailer supported only by a jack, and do not place a jack or stand under an axle tube unless the manufacturer specifically directs it.
With the wheel installed, look for missing nuts, nuts sitting unevenly, rust streaks radiating from the seats, wallowed wheel holes, or a wheel that no longer sits flush. Compare all wheels rather than assuming the first one represents the rest of the trailer.
When removal is already required for approved service, inspect the parts more closely. Look for:
- Cross-threaded, flattened, stretched, or visibly damaged stud threads.
- Bent, loose, spinning, or heavily corroded studs.
- Cracked, rounded, distorted, or mismatched lug nuts.
- Damaged cone seats or elongated mounting holes in the wheel.
- Corrosion, debris, or raised material preventing the wheel from seating flat.
- Paint buildup or damage at the mounting interface that conflicts with the wheel maker’s instructions.
Do not chase questionable threads, hammer a bent stud straight, substitute a different seat style, or install an open or closed nut solely because it looks similar. Have damaged studs, mounting holes, or hub hardware evaluated and replaced using approved parts and procedures.
Use the specified torque condition and sequence
A calibrated torque wrench is the tool for final tightening. An impact wrench may be useful only where the manufacturer’s process permits it for removal or preliminary installation; it is not a substitute for measuring final torque. Load Rite’s C-200 manual explicitly instructs owners to use a torque wrench and not an impact wrench for final tightening. Load Rite C-200 Owner’s Manual
Use the thread condition specified by the manufacturer. Do not add oil, anti-seize, or another lubricant unless the procedure expressly calls for it; a published value may assume a particular dry or lubricated condition. Also confirm the torque unit. Foot-pounds and newton-meters are not the same number, and inch-pounds differ from foot-pounds by a factor of twelve.
Start every nut or bolt by hand to avoid cross-threading. Seat the wheel squarely against the hub. Tighten in the specified crisscross or star sequence and in the prescribed stages, moving gradually toward the final value instead of fully tightening one position first. Dexter’s product bulletin calls for hand-starting the fasteners, staged tightening, and the sequence shown for the applicable bolt count.
If the wrench clicks before the fastener visibly seats or a stud turns with the nut, stop. Do not increase torque to overcome a mechanical problem. Likewise, replace a wrench that is clearly unsuitable for the specified range rather than working at the extreme edge of an unknown tool’s capability.
Recheck after wheel installation
Wheel-fastener service is not finished with the first final-torque pass. Dexter says to torque before initial road use and after every wheel removal, then recheck after 10, 25, and 50 miles, followed by periodic checks. Those are Dexter’s instructions for the covered assemblies; your trailer or wheel manufacturer may specify different distances or conditions. Follow the controlling documentation for the installed parts. Dexter’s light-duty running gear service manual
Before towing after storage, use the specified torque wrench and sequence on every wheel. During the early recheck period, carry the correct socket and torque wrench and stop at safe locations. A paint mark can help reveal relative movement only if the manufacturer permits it; it does not replace measured torque.
Load Rite’s public guidance calls for checking wheel nuts before each trailer use and tightening in a star pattern. That frequent check matters on boat trailers because repeated launching, road vibration, corrosion exposure, and wheel removal for tire or brake work can all change the maintenance picture. Load Rite Lug-Nut FAQ
Know when torque is not the repair
Torque verification cannot restore a cracked wheel, stripped thread, damaged seat, or loose stud. If a fastener will not hold the specified torque, if it binds before seating, or if repeated checks show movement, remove the trailer from service until the cause is corrected.
After replacement, confirm the new stud, nut, and wheel are compatible as a system. Dexter’s guidance also calls for adequate thread engagement; compare the installed assembly with the exact specification rather than accepting a few visible threads as a universal rule for every design.
Use this final checklist:
- Wheel, stud, nut, seat style, and torque specification are positively identified.
- Fasteners and wheel mounting holes show no visible damage requiring repair.
- The mounting surfaces are prepared exactly as the manufacturer directs.
- All fasteners are hand-started and tightened in the correct staged sequence.
- Final torque is measured with a suitable torque wrench.
- Required mileage-based and pre-tow rechecks are planned.
Record wheel-fastener service in BoatDuty
Add a BoatDuty record for each wheel position rather than one vague entry for the whole trailer. Note the date, trailer mileage if available, wheel position, wheel and stud specifications, final torque value and unit, torque source, wrench used, and whether the wheel was removed or any fastener was replaced.
Record the first-road-use recheck dates and mileage separately. If a stud, nut, or wheel needs replacement, keep that item pending until the repair and the subsequent torque sequence are complete. This history helps connect recurring looseness with a specific wheel position instead of repeatedly tightening the symptom.