

A boat rudder inspection after haulout can reveal impact damage, corrosion, bearing wear, seal trouble, and loose steering connections while every critical area is accessible. The goal is not simply to look at the painted blade. A useful inspection follows the load path from the rudder blade through the stock and bearings to the tiller arm, quadrant, hydraulic cylinder, or other steering connection inside the boat.
Rudder arrangements vary widely. Some boats use plain bushings, while others have rollers or self-aligning bearings. Sealing may rely on a rudder port, stuffing box, lip seal, or flexible gaiter. Steering loads may reach the stock through a quadrant and cables, a tiller arm and hydraulic ram, or a linkage unique to the builder. Use this guide to organize the inspection, then follow the boatbuilder's and component manufacturer's procedures for lubrication, fastener torque, clearances, seal service, and rudder removal.
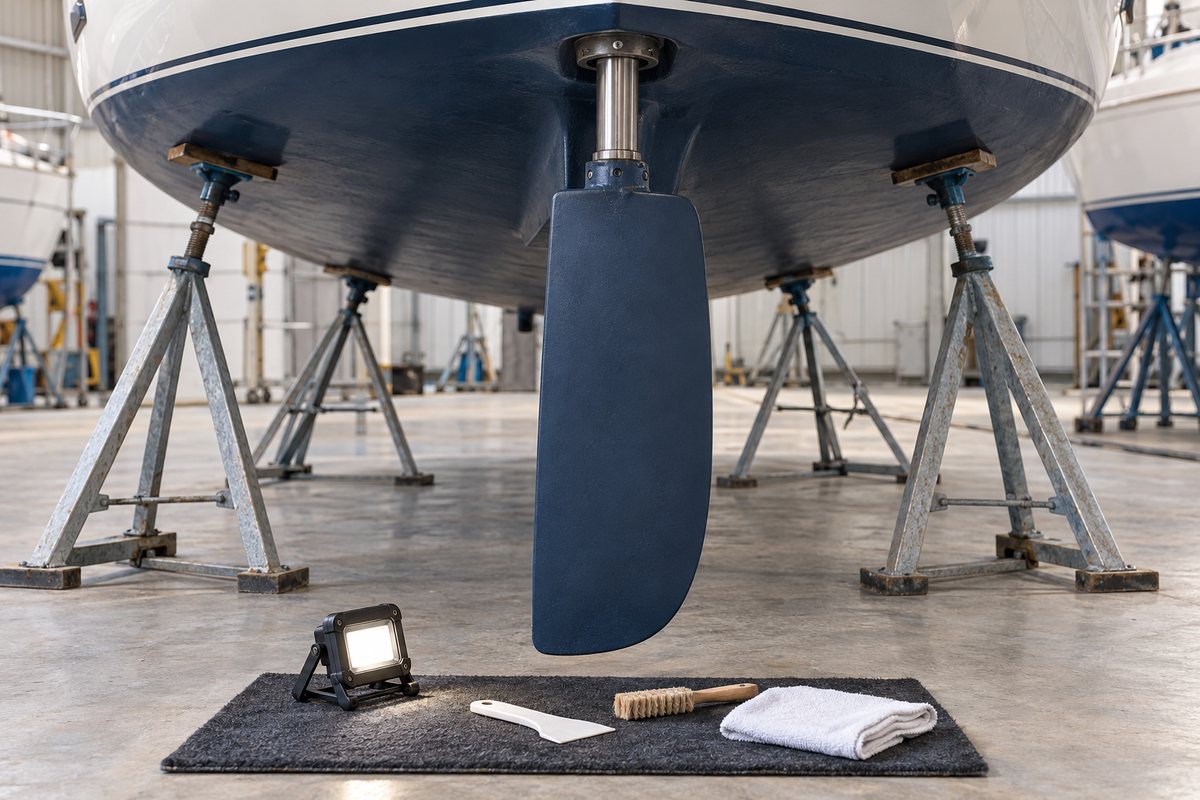
Start With a Steering Baseline
If practical, make notes before haulout while the boat is still operating normally. With the engines off and the boat secured, move the steering slowly through its usable range. Record any new stiffness, notchiness, squeak, delay, or free play. A symptom that appears only under load can help a technician separate rudder or bearing trouble from a helm, cable, hydraulic, or autopilot problem.
After haulout, do not work beneath a boat until the yard has blocked and supported it correctly. Confirm that the rudder has enough clearance below it before anyone loosens a bearing, collar, tiller arm, quadrant, or vertical-retention component. A large rudder can be heavy and awkward even when it looks manageable. Dropping one is normally a planned yard job with proper support, lifting equipment, and the applicable service information.
Clean the Rudder Without Hiding Evidence
Growth and dried residue can conceal hairline cracks and surface changes. Rinse the rudder and the hull-to-rudder gap with fresh water. Use cleaning methods compatible with the blade's laminate, metal, coatings, and antifouling system. Avoid aggressive grinding at the stock entry, bearing housing, or seal area simply to make the parts look clean.
Before removing stains, photograph anything unusual. Rust-colored streaks, green deposits, powdery aluminum corrosion, weeping cracks, or a clean line through otherwise fouled paint can help identify movement or water flow. These clues may disappear after washing.
Inspect the Rudder Blade and Stock Entry
Use bright, low-angle light and examine both faces, the leading and trailing edges, the bottom, and the top of the blade. Pay particular attention to the area where the rudder stock enters the blade and to any location that could have contacted the bottom, a submerged object, or lifting equipment.
Look for:
- Cracks, splits, impact chips, exposed laminate, dents, or bent metal
- Bulges, distortion, or a blade that no longer appears symmetrical
- Weeping, persistent moisture, rusty staining, or corrosion products
- A failed or separated sealant fillet where the stock enters the blade
- Localized paint failure that may indicate flexing or poor coating adhesion
- Evidence that the rudder has contacted the hull, propeller, strut, or another structure
Cosmetic paint damage is not the same as structural damage, but the distinction may require professional evaluation. Cracks at a stock entry, a visibly distorted blade, unexplained water drainage, or damage after a grounding deserves more than a quick patch and repaint.
Check the Rudder Shaft for Corrosion and Movement
Inspect as much of the exposed rudder stock as the installation allows. Jefa Marine advises annual inspection of its rudder shafts for signs of electrolysis, including circular corrosion patterns on the shaft surface. That guidance is specific to Jefa systems, but the broader lesson applies to any rudder: unusual pitting, crevice corrosion, scoring, or material loss at the bearing and seal zones should be investigated before launch.
Do not assume every bright shaft is stainless steel or that every rudder stock can use the same cleaner, coating, or corrosion-control method. Stocks may be stainless steel, aluminum, composite, or another material. Confirm the construction and follow its manufacturer before polishing, bonding, applying antifouling, or adding an anode.
With the rudder supported, check for movement at the stock-to-blade connection and at accessible steering hardware. Any movement between a quadrant or tiller arm and the stock is a serious finding. Jefa notes that movement at this connection can damage the shaft keyway. Inspect clamps, keys, pinch bolts, set screws, collars, and locking hardware according to the installed system rather than tightening them by feel.
Evaluate Rudder Bearings and Steering Feel
Have one person move the rudder gently while another watches the upper and lower bearing areas from a safe position. The rudder should rotate smoothly without a repeating tight spot, grinding, or a sudden change in effort. Carefully check for side-to-side or fore-and-aft movement at the blade and stock. A small designed clearance in one system may be unacceptable in another, so compare findings with the boatbuilder's specification or a qualified yard's assessment.
Useful warning signs include:
- Increasing steering effort or an irregular, notchy sweep
- A clunk when the rudder changes direction
- Visible stock movement inside a bearing housing
- Black, metallic, or plastic debris near a bearing
- Salt crystals, silt, or hardened deposits around an exposed bearing
- A top or bottom bearing that shifts relative to its mounting structure
Jefa's guidance illustrates why universal lubrication advice is unsafe. Its roller-bearing instructions specifically warn against putting grease between the rollers. Jefa instead calls for fresh-water rinsing after haulout and model-specific cleaning procedures. A plain bronze bushing, composite bearing, spherical bearing, and roller bearing can have very different service needs. Identify the hardware before applying grease, oil, solvent, or spray.
Inspect the Rudder Tube, Seals, and Gaiters
Inside the boat, make the rudder-stock area dry and well lit. Look for current leakage, dried water tracks, corrosion, staining, displaced seal parts, and movement where the bearing or rudder tube meets the hull structure.
Depending on the design, inspect:
- Lip seals for cracking, cuts, porosity, deformation, or loss of contact
- Flexible gaiters for splits, chafe, hardened rubber, and damage near clamps
- Stuffing boxes or rudder ports for leakage and service condition
- Hose clamps or retaining bands for corrosion, position, and proper engagement
- Bearing mounts, backing structures, tabbing, and fasteners for cracks or movement
- Vertical locking collars or retention parts for evidence of slipping
Jefa recommends annual visual checks of its PUR lip seals and yearly gaiter inspection, especially around the clamps. Those intervals and materials are not universal. If a seal must be disturbed, use the exact replacement and installation method specified for the system. A temporary reduction in leakage is not proof that a worn seal, cracked gaiter, or moving bearing mount is sound.
Inspect Quadrants, Tiller Arms, Stops, and Linkages
The steering connection above the rudder stock deserves the same attention as the underwater blade. Edson's steering inspection checklist calls for inspection of idler plates and sheaves for corrosion and wear, tightening of steering-system fasteners, alignment for fair cable runs, and verification of quadrant or radial connections at the rudderpost.
Not every boat has cable steering. Apply the same load-path logic to the installed system:
- Quadrant or radial wheel: Check for cracks, corrosion, loose hub hardware, cable damage, and alignment.
- Tiller arm: Check the clamp or key connection, pinch bolts, corrosion, and evidence of movement on the stock.
- Hydraulic cylinder: Inspect its mounting points, clevises, bushings, pins, locking hardware, rod condition, and hose routing.
- Autopilot connection: Inspect the independent tiller arm, ram mounts, pins, and stops without assuming the autopilot drive can serve as the rudder stop.
- Rudder stops: Confirm both directions stop at the intended structure before hoses, cables, cylinders, or the blade are overloaded.
Marking the relationship between a tiller arm or quadrant and the shaft with a fine witness line can make future movement easier to spot. Do not use a mark as a substitute for correct clamping, keys, fasteners, or manufacturer checks.
Protect Bearings and Shafts During Bottom Painting
Mask the rudder stock, bearing openings, seals, and moving bearing parts as required by the manufacturer. Jefa's current coating guidance says to keep metal-based antifouling at least 50 mm from its rudder bearings and shaft, and to keep coating off rollers and bearing balls. That distance is a Jefa instruction, not a universal specification; other systems may require a different boundary or coating.
Do not paint over a crack, moving joint, loose fastener, corroded shaft, or leaking seal to make the area look finished. Resolve the condition first, document the repair, and use coatings compatible with the blade, stock, bearing materials, and existing antifouling system.
Decide What Can Wait and What Cannot
Some findings can be documented for planned service. Others should stop the launch.
Arrange professional evaluation before launch if you find:
- Structural cracking, delamination, or a distorted rudder blade
- Significant stock pitting, section loss, scoring, or suspected bending
- Movement between the stock and blade, tiller arm, or quadrant
- Loose bearing housings or cracked supporting structure
- Binding, severe free play, or an irregular rotation that remains after cleaning
- Damaged sealing components with active leakage or doubtful retention
- Missing or ineffective rudder stops
- Damage following a grounding or hard impact
When parts are replaced or disturbed, complete a full steering-range test on land where appropriate, then perform the manufacturer's dockside and underway checks after launch. Verify correct direction, full travel, stop engagement, hydraulic or cable condition, and the absence of leakage.
Rudder Inspection Checklist
- Record pre-haulout stiffness, free play, noise, and steering range
- Confirm safe blocking and adequate clearance before any disassembly
- Photograph stains, cracks, deposits, and impact marks before cleaning
- Clean and inspect both faces, edges, bottom, and stock-entry area
- Inspect exposed stock for pitting, scoring, corrosion, and movement
- Check the rudder gently for play and smooth rotation
- Identify the bearing type before applying any lubricant or cleaner
- Inspect rudder tube, seals, gaiters, clamps, and retention components
- Inspect quadrant, tiller arm, cylinder, autopilot link, and rudder stops
- Protect shafts, seals, and bearings during coating work
- Complete model-specific reassembly and post-launch checks
Record the Work in BoatDuty
Rudder condition changes slowly, which makes a consistent maintenance record especially valuable. In BoatDuty, record the haulout date, engine hours if useful for the broader service event, steering symptoms, observed play, bearing and seal type, coating products, fastener or part specifications, photographs, measurements, and repairs. A note such as “slight movement” becomes much more useful when it identifies the exact location and includes a photo or measured reference.
The next haulout can then answer the important question: is the rudder system unchanged, or is wear progressing?