

Boat navigation light maintenance belongs on the fall checklist even if every light illuminated on the last evening cruise. A lamp can glow through a salt-fogged lens, a loose pole socket can work only at one angle and a fixture can shine brightly while its required visibility sector is blocked by canvas or installed out of alignment. An end-of-season inspection lets you correct those problems before darkness and restricted visibility make them urgent.
This guide covers permanently installed navigation lights and removable pole lights on recreational boats. The correct light arrangement depends on vessel length, propulsion, activity and operating area. Use the boatbuilder documentation and the current U.S. Inland or International Navigation Rules that apply to the boat. Do not use this article to redesign a navigation-light plan.
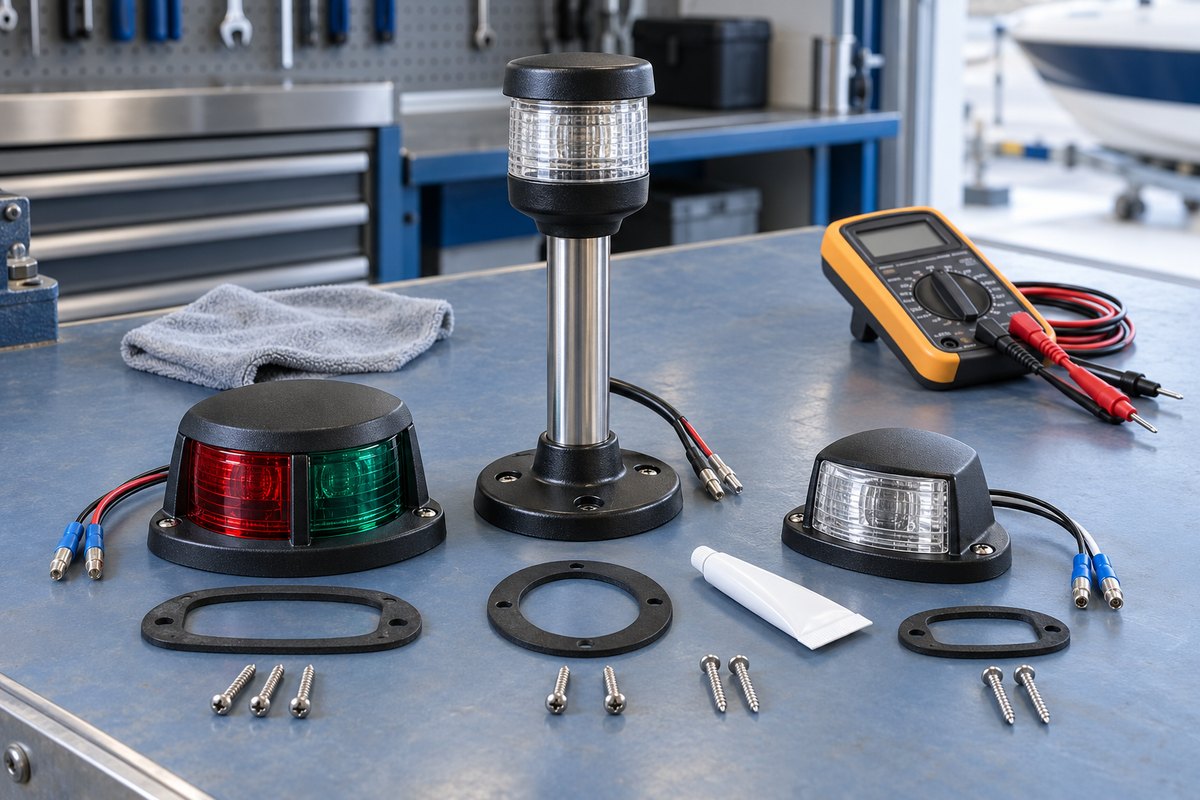
Start With the Required Light Configuration
Inventory the lights actually installed: sidelights or a red-and-green bi-color light, masthead light, sternlight, all-round white light and any sailing, towing or anchor lights applicable to the vessel. Note whether each fixture is incandescent, replaceable-bulb LED or a sealed LED assembly.
The U.S. Coast Guard states that navigation lights are displayed from sunset to sunrise and in or near restricted visibility such as fog, snow or heavy rain. Its recreational-boating guide illustrates, for example, that a power-driven vessel under 12 meters may use an all-round white light and sidelights as one permitted arrangement. Larger vessels and special operations have different requirements.
Confirm the boat’s configuration rather than copying a neighboring boat. Record:
- Vessel length and propulsion type
- Fixture manufacturer and model where visible
- Approval or certification markings
- Rated voltage and replaceable-bulb part number, if applicable
- Lens color and intended arc of visibility
- Mounting location, height and orientation
Do not substitute a decorative lamp, automotive bulb or unmarked fixture for a certified navigation light. The Coast Guard has warned about unapproved lights and about decorative lighting that can obscure or be mistaken for prescribed navigation lights.
De-Energize the Circuit for the Physical Inspection
Perform the first inspection in daylight with the navigation-light circuit switched off. Isolate the circuit at the breaker or battery switch when removing a lens, pole or fixture. Verify the circuit is de-energized with an appropriate meter if you will handle conductors.
Walk around the boat before removing anything. Look for:
- Cracked, crazed, clouded or deeply scratched lenses
- Salt, insect debris, mildew or wax buildup
- Water droplets or corrosion inside a fixture
- A loose fixture, bent pole or damaged mounting base
- Missing fasteners, deteriorated gaskets or failed sealant
- Paint, canvas, hardware or accessories encroaching on the light
- Red or green lenses installed on the wrong side or a bi-color light rotated off center
Photograph the mounting orientation before disassembly. Sidelight sectors and centerline alignment are functional parts of the navigation-light system, not styling choices.
Clean Lenses Without Changing Their Optical Performance
Follow the fixture manufacturer’s cleaning instructions. Perko’s 0200-series instructions specify fresh water and mild detergent. That conservative method avoids solvents or abrasive polishes that may craze plastic, remove coatings or alter the lens surface.
Rinse loose grit first, then wash with a soft cloth. Do not use a dry abrasive pad, household glass cleaner containing aggressive chemicals or a power buffer unless the light maker explicitly approves it. Replace a lens that remains cloudy, cracked, heat-damaged or faded after proper cleaning.
Use the exact replacement lens for the fixture. Red and green lenses must maintain the designed color and horizontal sector, while clear lenses and internal screens control white-light output. A piece that physically fits is not necessarily optically correct.
Inspect the lens gasket and mating surface. The gasket should be continuous, correctly seated and resilient, without compression gaps or tears. Remove debris from drain or vent features without enlarging them. Apply sealant only where the installation instructions call for it; sealing an intended vent can trap moisture.
Inspect Bulbs, LED Modules, Sockets, and Contacts
For a replaceable incandescent bulb, examine the filament, glass, base and socket. Darkened glass, a loose base, heat distortion or corrosion justifies replacement with the exact specified bulb. Wattage and filament location affect light output and sector performance. Perko’s installation literature directs owners to use the specified replacement bulbs for the fixture.
Do not install an LED retrofit bulb in an incandescent fixture unless the fixture manufacturer approves that exact combination. A retrofit may change focal position, intensity, color or visibility sector even when it fits the socket and appears brighter at the dock.
For a sealed LED light, inspect the lens, potted cable entry and housing seam. Individual emitters that flicker, fail or show uneven color usually require replacement of the approved module or complete fixture. Do not open a sealed assembly unless the manufacturer provides a service procedure.
Clean removable pole-light contacts with the method approved for that base. Check that spring contacts move freely, pins are straight and the locking collar or detent holds the pole securely. Apply dielectric grease only if the manufacturer permits it and only in the amount and location specified. Excess grease can collect grit or interfere with contact pressure.
Check Mounting, Gaskets, and Alignment
Gently test each fixture and base for movement. Loose mounting screws can allow water entry or change alignment. Remove one fastener only when necessary and protect the cored deck or backing structure from water. Repair stripped holes or soft substrate correctly rather than installing a larger screw without evaluating the mounting surface.
Alignment matters. Perko’s 0200-series instructions specify different mounting-hole relationships to the boat centerline for tricolor, masthead, stern and sidelight configurations. That is one product family’s instruction, but the principle applies broadly: reinstall the fixture using its own alignment marks and manual.
Verify that:
- The red sidelight shows to port and green to starboard
- A bi-color light’s dividing line aligns with the vessel centerline
- Shields and internal dividers are present and correctly seated
- A removable pole reaches its full locked position
- The pole remains vertical at the boat’s normal trim
- Fixtures cannot rotate when covers or canvas are installed
- Wiring enters through a protected, sealed path without pulling on terminals
Do not reposition a light based only on what looks symmetrical. Required vertical and horizontal placement varies by vessel size and light arrangement.
Inspect Wiring and Measure the Circuit Under Load
Trace accessible conductors from the fixture toward the switch or distribution panel. Look for chafe, unsupported runs, loose terminals, green corrosion, heat damage, brittle insulation and unsealed splices. Navigation lights are exposed to vibration and moisture; a no-load voltage reading can look normal even when corrosion causes a large voltage drop with the lamp on.
With the circuit reassembled and safely energized, test every switch position. Observe each light for steady output while gently checking a removable pole at its normal locked position. Do not wiggle exposed wiring on a live circuit.
If a light is dim or intermittent, measure voltage at the fixture while it is operating and compare it with source voltage using the fixture manufacturer’s limits. Perko’s 0200-series installation instructions call for less than 0.5 volt total drop in a nominal 12-volt installation and less than 1 volt in a 24-volt installation. Treat those values as product-specific guidance, not a universal limit for every LED system.
Correct the cause rather than increasing bulb wattage. Common faults include oxidized sockets, weak pole-base contacts, corroded crimp terminals, undersized wire and a failing switch. Use marine-rated conductors, terminals and circuit protection that match the boat’s approved design.
Perform a Darkness and Visibility-Sector Check
A daylight lamp test cannot confirm visibility. After physical and electrical work is complete, test the system at dusk or in darkness from outside the boat. The boat should be in its normal operating attitude, with commonly used canvas, antennas and equipment in place.
Move around the vessel and confirm that each prescribed light:
- Shows steadily without flicker
- Has the expected color
- Is not blocked by bow rails, anchor gear, canvas, antennas or occupants’ normal equipment
- Does not bleed through a cracked divider into the wrong sector
- Disappears and appears at reasonable sector boundaries without a large overlap
- Is not overpowered by decorative, docking or cabin lighting
This is a practical screening check, not a substitute for photometric certification or a professional survey. If mounting changes, a hardtop installation or new canvas has altered visibility, consult a qualified marine electrician or boatbuilder before moving fixtures.
The Navigation Rules caution against other lights that can be mistaken for prescribed lights, impair their visibility or interfere with a proper lookout. Test decorative lighting separately and keep it off when it would create confusion.
Know When to Replace the Fixture
Replace a navigation light or obtain professional service when you find:
- A cracked, badly crazed, faded or unavailable correct lens
- Corrosion that has damaged the socket, contact spring or circuit board
- An LED assembly with failed emitters or unstable output
- A pole or base that will not lock securely
- Missing shields or dividers that control the light sector
- An unapproved fixture or undocumented retrofit bulb
- Heat-damaged wiring or repeated fuse or breaker trips
- A mounting location that no longer provides the required visibility
Choose a replacement certified for the vessel size, light function, voltage and mounting orientation. Preserve approval labels and installation instructions in the boat records.
Boat Navigation Light Maintenance Checklist
- Inventory every prescribed navigation and anchor light
- Record fixture model, approval marking, voltage and bulb number
- De-energize the circuit before opening fixtures
- Inspect lenses for cracks, haze, fading and contamination
- Clean only with manufacturer-approved products
- Check gaskets, drains, vents, fasteners and mounting bases
- Inspect bulbs, LED modules, sockets and pole contacts
- Verify red/green orientation, dividers and alignment marks
- Inspect accessible wiring, terminals, splices and circuit protection
- Test each switch position and removable pole under load
- Perform a darkness check with normal canvas and equipment installed
- Replace only with the approved lens, bulb, module or fixture
Record Navigation-Light Service in BoatDuty
In BoatDuty, record the inspection date, each fixture’s function, manufacturer, model, voltage and replacement-bulb or module number. Note lens and gasket condition, corrosion found, measured voltage under load, terminals repaired and any fixture replaced. Attach photos showing alignment marks, pole-base contacts and the final nighttime test.
A complete record makes spring commissioning quicker and prevents the same uncertain bulb or lens search next season. More importantly, it preserves the exact configuration that other boaters rely on to interpret your vessel’s direction and status after dark.