

A boat horn is easy to ignore until the moment a clear warning signal matters. Salt spray, trapped water, corroded terminals, loose mounting hardware, an undersized circuit, or a tired diaphragm can gradually turn a strong marine horn into a weak buzz—or silence. A careful end-of-season inspection gives you time to correct those problems before spring launching, without waiting for a close-quarters maneuver to reveal them.
This guide focuses on permanently installed electric horns and compact electric-compressor air horns commonly found on recreational boats. Direct-air systems with a pressure tank, regulator, and large ship's horn need their own manufacturer-specific service procedure. Every installation is different, so identify the horn model, system voltage, fuse or breaker rating, and wiring diagram before loosening parts or applying power.
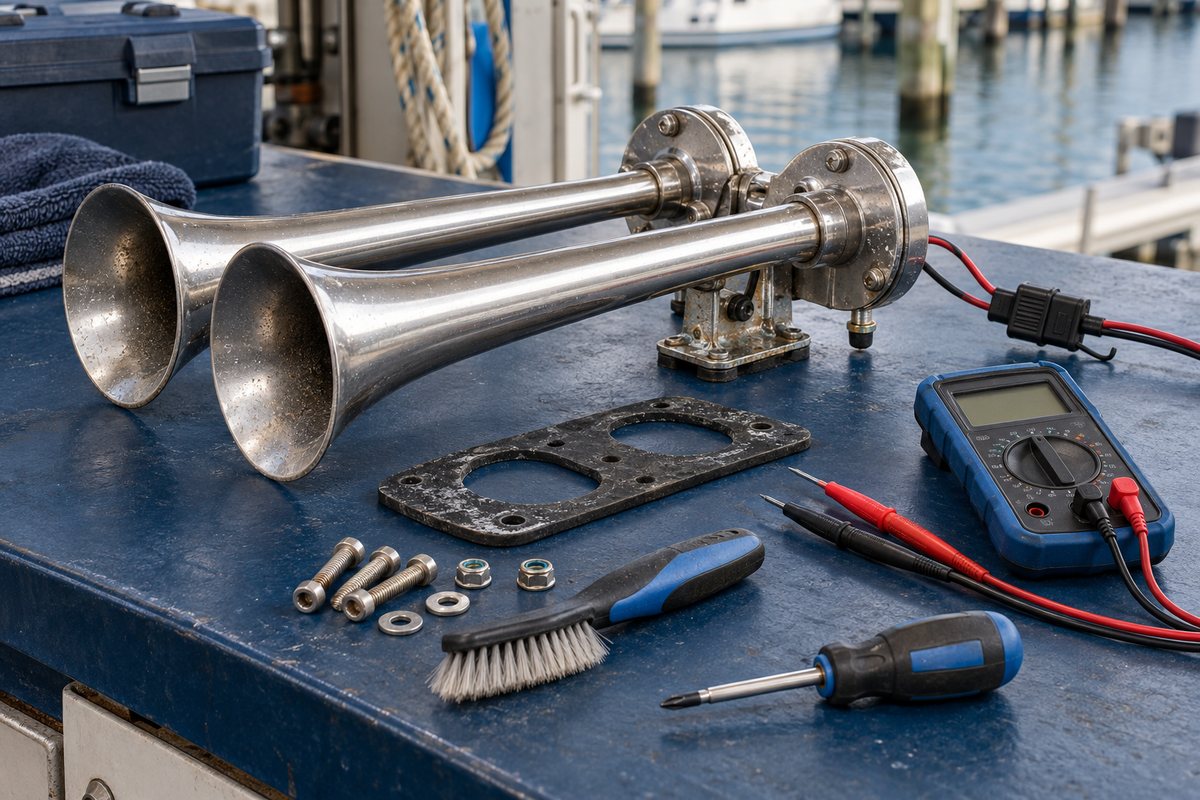
Why the Boat Horn Deserves a Real Maintenance Check
The horn is part of the boat's sound-signaling equipment, not just a convenience at the fuel dock. U.S. Coast Guard Navigation Rule 33 requires a vessel 12 meters or longer to have a whistle and requires a vessel under 12 meters to have some other means of making an efficient sound signal if it does not carry the prescribed appliance. Rule 34 assigns specific whistle signals to maneuvering and warning situations, while Rule 35 covers restricted visibility.
Those rules do not establish a universal seasonal service interval for a recreational electric horn. The practical lesson is simpler: the installed horn should be ready to produce a prompt, unmistakable signal whenever the boat is used. Testing it during layup also separates horn maintenance from the rushed launch-day checklist.
Start by Identifying the Horn System
Before disconnecting anything, determine which system you have:
- A compact electromagnetic horn, often installed behind a grille or below deck.
- A single- or dual-trumpet electric horn with an integral motor or diaphragm housing.
- A trumpet air horn supplied by a small 12- or 24-volt compressor.
- A larger pneumatic system with an air tank, valve, tubing, and drains.
Photograph the horn, its bracket, wire colors, terminal positions, fuse or breaker, relay, compressor, and tubing before disassembly. Record the model and voltage. Do not assume two horns that look alike have the same current requirement, fuse size, wire-size recommendation, or mounting angle.
If the nameplate is unreadable, treat that as a reason to identify the unit from the boat's documentation or the manufacturer—not an invitation to guess. A replacement horn also needs to suit the boat's voltage, installation environment, available circuit capacity, mounting space, and applicable sound-signal requirements.
Make the Inspection Safe
Shut off the horn circuit at its breaker or remove the correctly identified fuse. If you will touch the rear terminals or open a compressor enclosure, isolate the applicable DC supply according to the boat's electrical procedure. Verify the circuit is de-energized with a meter before placing a tool across terminals.
Gasoline-powered boats require extra care around machinery and fuel spaces. Electrical equipment in those spaces may be subject to ignition-protection requirements. Do not substitute a non-marine component, open a sealed ignition-protected device, or relocate a horn compressor into a gasoline vapor space without confirming the installation requirements. If access is close to fuel-system components or you are unsure about ignition protection, use a qualified marine technician.
Inspect the Horn Body, Trumpets, and Mounting
Begin with a dry visual inspection. Look for:
- Cracks, dents, split seams, loose end caps, or damaged grilles.
- Pitting, rust staining, green copper corrosion, or flaking plating.
- Insect nests, debris, paint, wax, or dried salt blocking the opening.
- Water trapped in a trumpet, grille, or diaphragm housing.
- Loose brackets, distorted mounting feet, missing fasteners, or a failed gasket.
- Chafe where the horn or its wiring touches a rail, deck edge, or hard fitting.
Mounting direction matters. Manufacturer instructions for some trumpet systems call for a location that minimizes spray, and certain models use a drain hole or a specified downward angle so water can escape. Confirm the orientation in the manual for your exact horn. Do not drill a generic drain hole into a sealed housing; you can destroy the enclosure or its corrosion protection.
Tighten mounting hardware only to the specified value. Stainless fasteners can gall, thin fiberglass can crack, and plastic bases can distort if overtightened. If a gasket or sealant bed has failed, remove the fitting and re-bed it with material compatible with the deck and horn base. Keep sealant out of horn openings and intentional drains.
Clean Without Damaging the Sound Mechanism
Rinse external salt with fresh water if the manufacturer permits it, then dry the unit thoroughly. Use a soft brush and mild boat soap on accessible exterior surfaces. Avoid forcing a pressure-washer stream into a trumpet, grille, drain, or compressor intake. Do not spray penetrating oil, corrosion inhibitor, or polish into a diaphragm or electromagnetic mechanism unless the manufacturer specifically directs it.
A stainless trumpet can be cleaned and protected on the outside, but abrasive polish should not reach plated parts, plastic diaphragms, rubber seals, or electrical connections. If the horn contains an insect screen or removable grille, clean it according to the manual and restore it in the original orientation.
Check Wiring, Protection, and the Horn Button
Trace the circuit from the distribution point to the horn. Depending on load and wire run, the system may include a breaker or fuse, a momentary horn switch, a relay, and the horn or compressor. Inspect every accessible part for:
- Loose ring terminals, spade terminals, or plug connectors.
- Green or white corrosion under insulation or heat-shrink.
- Brittle insulation, sun damage, crushed cable, or unsupported spans.
- Unsealed splices or household connectors in exposed locations.
- Heat discoloration at the switch, fuse holder, relay, or terminals.
- A fuse or breaker that does not match the manufacturer's instructions and wire capacity.
- A horn button that sticks, feels rough, or fails to return immediately.
Do not increase fuse size to stop nuisance opening. Circuit protection is selected to protect the conductors, and an unexpectedly opening fuse can be evidence of a stalled compressor, shorted winding, corroded connection, damaged wire, or incorrect installation. Likewise, do not assume the existing wire is adequate for a higher-current replacement horn. Manufacturer air-horn instructions can call for heavier wiring and different protection than an older electric horn.
Clean accessible terminals only after power is isolated. Replace badly corroded terminals rather than polishing away structural material. Use marine-grade tinned conductor, properly sized crimp terminals, sealed heat-shrink where appropriate, and supported routing. Apply terminal protection only where the equipment maker permits it; coatings should not insulate the actual contact surfaces before assembly.
Inspect a Compact Air-Horn Compressor and Tubing
If the horn uses a small electric compressor, check both the electrical and air sides. Inspect the compressor mount, inlet, outlet, power leads, fuse or relay, and any rubber isolators. The motor should be secure and dry, without rust streaks or overheated wiring.
Follow the tube from compressor to horn. Look for kinks, splits, hard or cloudy tubing, loose fittings, sharp bends, low spots that trap water, and chafe at bulkheads. Tubing must match the specified material and diameter; a restriction or leak can weaken the signal even when the compressor sounds normal.
Larger tank-fed systems require additional work, including condensate draining, tank and valve inspection, and compressor service. Follow that system's manual. Kahlenberg, for example, publishes model-specific instructions and identifies drainage provisions on its horn systems. A procedure for one model is not a universal service recipe.
Test Sound Output Deliberately
Restore power only after tools are clear, terminals are covered, and the horn is ready to operate. Warn anyone nearby and protect hearing; marine horns can be painfully loud at close range. Conduct the test where sounding the horn will not confuse other boaters or violate marina rules.
Press the horn button briefly. The horn should start immediately, sound cleanly, and stop when the button is released. Listen for:
- Delayed startup or intermittent operation.
- A weak, raspy, warbling, or changing tone.
- A relay click without horn output.
- A compressor that runs but produces little sound.
- A horn that continues after the button is released.
- New vibration from the bracket or deck.
A weak horn does not automatically mean the horn itself has failed. Low supply voltage, excessive voltage drop, corroded terminals, an inadequate ground or negative return, a damaged switch, restricted tubing, or water in the horn can produce similar symptoms. Compare measurements with the manufacturer's procedure and specifications.
If the breaker trips, a fuse opens, wiring heats, or insulation smells hot, stop immediately and isolate the circuit. Do not keep pressing the button to “clear” the fault.
Use Electrical Measurements to Find the Fault
Begin with the battery or distribution-bus voltage and the horn manufacturer's minimum operating requirements. Then measure voltage at the horn or compressor while it is actually operating. A no-load voltage reading can look normal even when corrosion or a damaged conductor causes a large drop under load.
Where the manual provides a method and limit, test both the positive and negative sides of the circuit under load. A high reading across a switch, connector, fuse holder, or cable section points to unwanted resistance in that section. Confirm the horn's current draw only with a suitable meter or clamp meter and a safe procedure; do not route horn current through a meter input that is not rated for it.
Do not use a jumper lead that bypasses circuit protection. If diagnosis requires direct activation at the horn, follow the maker's test instructions or have a marine electrician perform it.
Decide Whether to Service or Replace
Some horns have replaceable diaphragms, compressor parts, gaskets, or mounting hardware. Others are sealed assemblies. Rebuild only with the correct kit and instructions. Replace the horn when the enclosure is cracked, the winding or compressor is faulty, corrosion has compromised terminals or structure, water intrusion persists, or output remains unreliable after the supply circuit is verified.
When selecting a replacement, match:
- System voltage.
- Manufacturer-specified current draw, wire size, and circuit protection.
- Mounting footprint, orientation, drainage, and exposure rating.
- Ignition-protection requirements for the location.
- Sound-signal performance appropriate for the vessel.
Do not choose solely by advertised loudness. Frequency, directional pattern, installation, and compliance matter, and decibel figures may not be measured on the same basis.
Winter Storage and Spring Recommissioning
After the test, leave the horn clean, dry, firmly mounted, and protected from direct water entry without sealing intentional drains. Correct failed deck bedding before freeze-thaw cycles enlarge the leak. Secure loose wiring and tubing so winter work around the boat cannot snag them.
For a removable compressor or manufacturer-approved serviceable unit, follow its storage instructions. Do not wrap an installed horn in plastic that can trap condensation. If the boat remains in service, keep the horn operational and accessible.
In spring, inspect for nesting insects, storage damage, corrosion, and loose fasteners. Restore any disconnected circuit protection, then make another brief functional test before departure.
Boat Horn Maintenance Checklist
- Identify horn type, model, voltage, and circuit protection.
- Photograph wiring, tubing, and mounting before disassembly.
- Isolate power and verify the circuit is de-energized.
- Inspect trumpet, grille, housing, drain, gasket, and bracket.
- Remove salt and debris without forcing water or chemicals inside.
- Check wires, terminals, switch, relay, fuse holder, and breaker for damage or heat.
- Inspect compressor, air tubing, fittings, and drains where fitted.
- Restore covers and terminal boots before energizing.
- Make a brief, considerate sound test and note the tone and response.
- Investigate voltage drop, current draw, or pneumatic restrictions using model-specific limits.
- Correct leaks, corrosion, chafe, and loose mounting before storage.
- Record the service and schedule a spring retest.
Keep a Useful Maintenance Record
In BoatDuty, record the horn manufacturer and model, system voltage, fuse or breaker rating, wire size if known, test date, observed tone, measured operating voltage, parts used, and any terminal or tubing repair. Add a note if the horn is difficult to access or if a replacement requires a particular mounting angle. That record turns next season's inspection into a comparison instead of a fresh investigation.
A horn that sounds strong today still deserves a short spring check. The goal of end-of-season maintenance is not simply to make noise at the dock; it is to confirm that the entire sound-signaling system—mount, drainage, conductors, controls, and horn—will respond predictably when needed.