

Boat deck cleat maintenance before winter storage deserves more attention than a quick polish. A cleat transfers dock-line loads into the deck structure. If its fasteners loosen, its backing support corrodes, or its bedding leaks, the visible hardware may still look good while the laminate or core below it is deteriorating.
Inspecting cleats after the season helps uncover movement, water intrusion, and overloaded mounting hardware before winter moisture and freeze cycles make the problem worse. Fixed horn cleats, pull-up cleats, pop-up cleats, and folding cleats differ in construction, so use the boat builder’s and hardware manufacturer’s instructions for removal, replacement parts, sealant compatibility, fastener size, and tightening values.
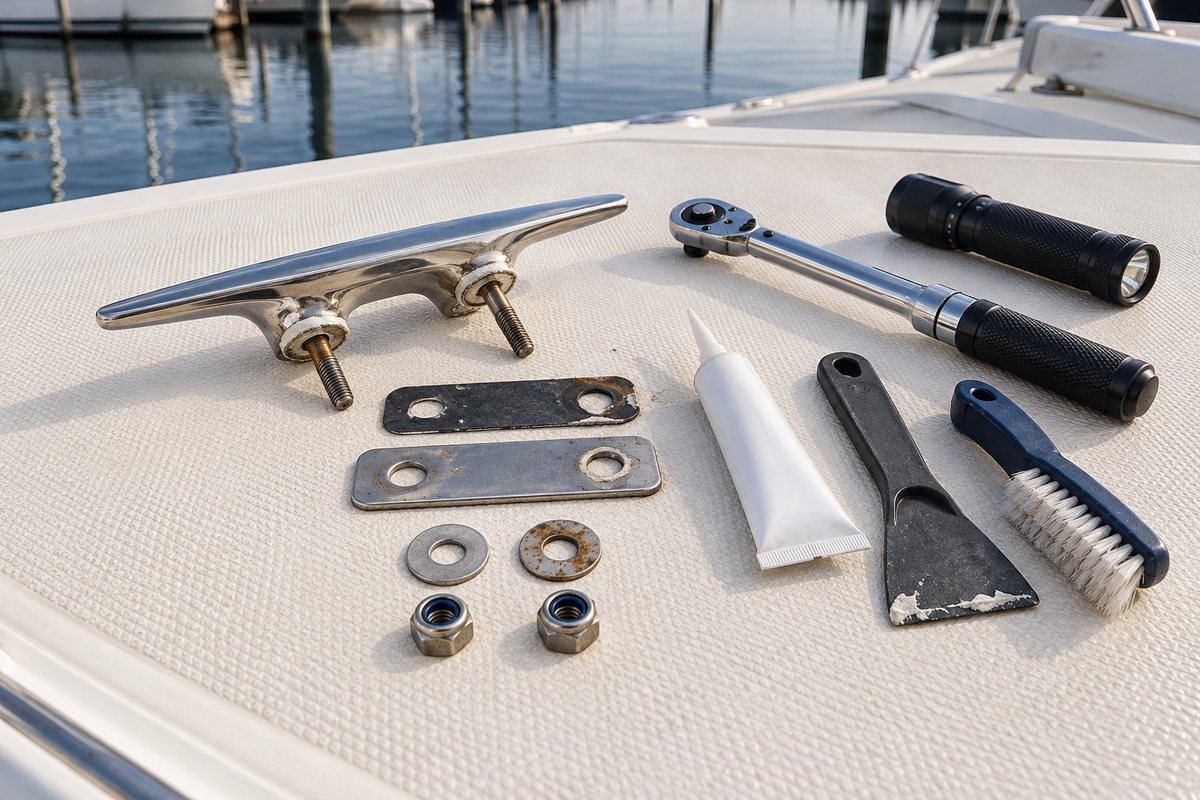
Understand the Cleat as a Complete Load Path
A properly installed cleat is more than the casting on deck. Its load path may include:
- the cleat body or retracting mechanism;
- studs, bolts, or manufacturer-specific anchors;
- sealant or a gasket beneath the base;
- the upper fiberglass skin;
- core material or solid laminate;
- an interior liner or deck underside;
- flat washers, a backing plate, structural blocking, nuts, and locking hardware.
High dock-line loads change direction as the boat surges, rolls, and pulls against wind or current. The installation has to distribute those loads without allowing the cleat to rock or the fasteners to crush the deck. Gemlux’s cleat guidance calls for mounting cleats in reinforced deck areas with appropriate backing support. WEST SYSTEM’s fiberglass repair manual similarly explains that movement and leakage around hardware can lead to delamination and core damage.
Start With a Clean, Unloaded Cleat
Move the boat to a condition where the cleat is not carrying a dock line before inspecting it. Reposition only one line at a time and maintain safe mooring at all times. Never remove or loosen a cleat that the boat currently depends on.
Wash off salt and dirt with products approved for the deck and hardware. Do not use aggressive abrasives on plated hardware or polished stainless steel. Once clean and dry, photograph the cleat and note its location: port bow, starboard spring, stern, or another specific position.
Look for Movement and Deck-Surface Clues
Apply gentle hand pressure in the directions the line normally loads the cleat. The hardware should not rock, click, lift, or shift. This is an inspection, not a proof-load test; do not use a bar, hammer, winch, vehicle, or dock line to force movement.
Check for:
- a gap opening beneath the cleat base;
- cracked, missing, or lifted bedding material;
- brown, green, or white streaks from fasteners or dissimilar metals;
- gelcoat cracks radiating from the mounting holes;
- a depressed or distorted deck surface;
- softness, creaking, or a hollow change near a cored deck installation;
- loose decorative caps or covers;
- sharp casting damage that could cut a line;
- distortion where a cleat has been shock-loaded.
Hairline gelcoat cracks do not automatically prove structural failure, but cracks combined with movement, water staining, or a soft deck require investigation. Simply covering a crack with sealant can conceal the entry point without restoring the load path.
Inspect the Underside and Backing Support
If access is available, use a light and mirror or camera to examine the underside. Do not cut an access hole without understanding the structure and systems behind the surface.
Look for loose nuts, missing washers, a bent or undersized backing plate, rust, white aluminum corrosion, water trails, damp core, compressed laminate, cracked blocking, or a liner separating from the deck. Confirm that every fastener is engaged and that the backing support bears evenly rather than bridging over an uneven surface.
Not every cleat uses the same arrangement. Some retractable or blind-mount products use a proprietary cup, drain, anchor, or backing component. A large washer is not automatically equivalent to a purpose-designed backing plate, and a plate is only useful when the surrounding structure can carry the load. Compare the actual installation with the cleat manufacturer’s drawing and the boat builder’s construction details.
Know When Removal Is Justified
A dry, rigid cleat with intact bedding and correct hardware may not need to be removed simply because the boat is entering storage. Unnecessary removal can damage finishes or introduce new leaks. Removal becomes appropriate when you find movement, leakage, failed bedding, questionable fasteners, corrosion, elongated holes, a damaged mechanism, or evidence of wet core.
Before removal:
- Verify that no line or equipment depends on the cleat.
- Photograph the top and underside, including washer and backing-plate order.
- Confirm safe access and identify hidden wiring, hoses, headliners, and structure.
- Obtain the correct replacement fasteners, gasket, sealant, and manufacturer instructions.
- Support the backing plate so it cannot fall into an inaccessible cavity.
Do not pry aggressively against gelcoat. Use the sealant-removal method approved for the deck material and hardware. A cleat that will not release may have been installed with a high-strength adhesive; forcing it can pull away laminate or gelcoat.
Inspect the Cleat and Fasteners Off the Boat
Clean away old bedding without gouging the cleat base or deck. Inspect the base for distortion, pitting, cracks, crevice corrosion, and an uneven bearing surface. On pull-up or pop-up cleats, check the moving posts, cup, springs, drain, and stops according to the manufacturer’s instructions. The mechanism should move smoothly without becoming a water trap.
Examine every fastener:
- Threads should be complete, clean, and free of galling.
- Studs and bolts should be straight.
- Nuts should run correctly on their matching threads.
- Washers and backing plates should lie flat.
- Locking features should be renewed when the manufacturer treats them as single-use.
- Hardware material and grade should match the specified system.
Stainless fasteners can gall during removal or tightening. Do not reuse a fastener with torn or seized threads. Do not automatically apply oil, anti-seize, or threadlocker; lubrication changes the relationship between torque and clamping load, and some chemicals are incompatible with plastics, sealants, or specific locking nuts.
Investigate Wet or Damaged Core Before Rebedding
Water entering a fastener hole can migrate into balsa, plywood, or foam core. Warning signs include dark or damp material, staining below the hole, a soft deck, a widened hole, delamination, or hardware that will not hold torque.
Drying the surface and adding new sealant does not repair compromised core. The damaged area may need to be opened, dried, removed, rebuilt, and isolated from the fastener penetration. WEST SYSTEM publishes detailed hardware-installation and fiberglass-repair procedures, but the correct repair depends on laminate type, core material, load, access, and damage extent.
Because a cleat is load-bearing safety hardware, obtain professional repair when the deck is soft, the laminate is cracked, holes are elongated, backing structure is inadequate, or the original construction is uncertain.
Select Bedding for Serviceability and Compatibility
Bedding keeps water out; it should not be expected to compensate for weak structure or loose hardware. Choose a product approved by the boat builder, cleat manufacturer, and sealant manufacturer for the specific deck and hardware materials.
“Stronger” is not always better. Some polyurethane adhesives are intended for permanent structural bonds and can make future cleat removal destructive. 3M describes its 4000 UV product as a flexible marine adhesive/sealant suitable for deck hardware and designed to allow removal for rework, while 4200 is a medium-strength product that permits disassembly. Those descriptions do not make either product universally correct. Acrylic, polycarbonate, painted surfaces, teak, aluminum, fiberglass, and existing sealants can have different compatibility and preparation requirements.
Check shelf life, cure temperature, surface preparation, primer requirements, working time, and cure time on the current product data sheet. Do not mix new sealant with unidentified residue and assume the bond will be watertight.
Reinstall Without Starving the Seal
Dry-fit the entire assembly first. Confirm that the cleat sits flat, fasteners pass without binding, the backing plate bears evenly, and nuts have proper thread engagement. Correct structural or hole damage before applying bedding.
A general reinstallation sequence is:
- Clean and prepare mating surfaces as specified by the sealant manufacturer.
- Mask around the cleat base if needed for controlled cleanup.
- Apply the specified bedding around the fastener penetrations and beneath the sealing area.
- Insert the cleat and fasteners without wiping sealant out of the holes.
- Fit the backing plate, washers, and nuts in the documented order.
- Tighten evenly in stages using the manufacturer’s sequence and torque.
- Remove excess sealant by the approved method without pulling material out of the joint.
- Allow the full cure time before loading the cleat.
Avoid tightening until every trace of bedding is squeezed out. A starved joint may look neat but leave too little flexible material to maintain a seal as the deck and hardware move. Conversely, leaving the cleat loose without a manufacturer-approved staged-cure procedure can allow misalignment or movement. Follow the chosen product and hardware instructions rather than a generic internet shortcut.
Verify the Repair Before Returning the Cleat to Service
After cure, inspect the bedding edge and underside for gaps. Apply water around the base without blasting the joint with a pressure washer, then check the underside for moisture. Confirm that retractable models drain as designed.
Restore dock-line load gradually and observe the cleat from above and below if safe access allows. Stop if the base moves, the deck deflects, sealant tears, a backing plate shifts, or fasteners loosen. A repaired cleat should be rechecked after the boat has experienced normal dock loads.
Boat Deck Cleat Maintenance Checklist
- Identify and photograph every cleat location.
- Unload one cleat safely before inspection.
- Clean the cleat and deck with compatible products.
- Check for rocking, lifting, clicking, or distortion.
- Inspect bedding edges, gelcoat, and surrounding deck.
- Examine nuts, washers, backing plates, blocking, and water trails below.
- Compare proprietary or retractable hardware with the manufacturer’s drawing.
- Remove the cleat only when evidence or scheduled service justifies it.
- Replace galled, bent, corroded, or incorrect fasteners.
- Repair wet core, elongated holes, or weak backing before rebedding.
- Use a compatible, serviceable bedding product and documented cure schedule.
- Tighten to the cleat or boat manufacturer’s specification.
- Leak-check and recheck the cleat after normal loading.
Keep a Useful BoatDuty Record
In BoatDuty, record the cleat location, hardware type, inspection date, observed movement, leak evidence, fastener and backing-plate details, deck condition, sealant product and lot if available, cure time, tightening specification, and post-repair leak test. Add photos of the original washer and backing arrangement before disassembly.
Those details turn a one-time repair into a useful maintenance history. If a neighboring cleat begins to show the same staining or movement, you will have a proven reference for the hardware and materials already used on the boat.