

A boat boarding ladder is easy to overlook until someone needs to climb out of the water. Telescoping tubes, folding hinges, slide-out brackets, nonslip treads, mounting plates, fasteners, latches, and retention straps all work together under a concentrated load. Corrosion, loose hardware, cracked steps, or a jammed release can turn a simple reboarding task into a serious problem.
Fall storage is a good time to deploy the ladder fully, clean it, inspect both the visible hardware and the supporting structure, and record any repair needed before spring. This guide applies to permanently mounted swim-platform, transom, pontoon, and under-platform ladders. Removable hook ladders and emergency reboarding devices may use different fittings and procedures. Follow the boat builder's instructions and the ladder manufacturer's exact model information.
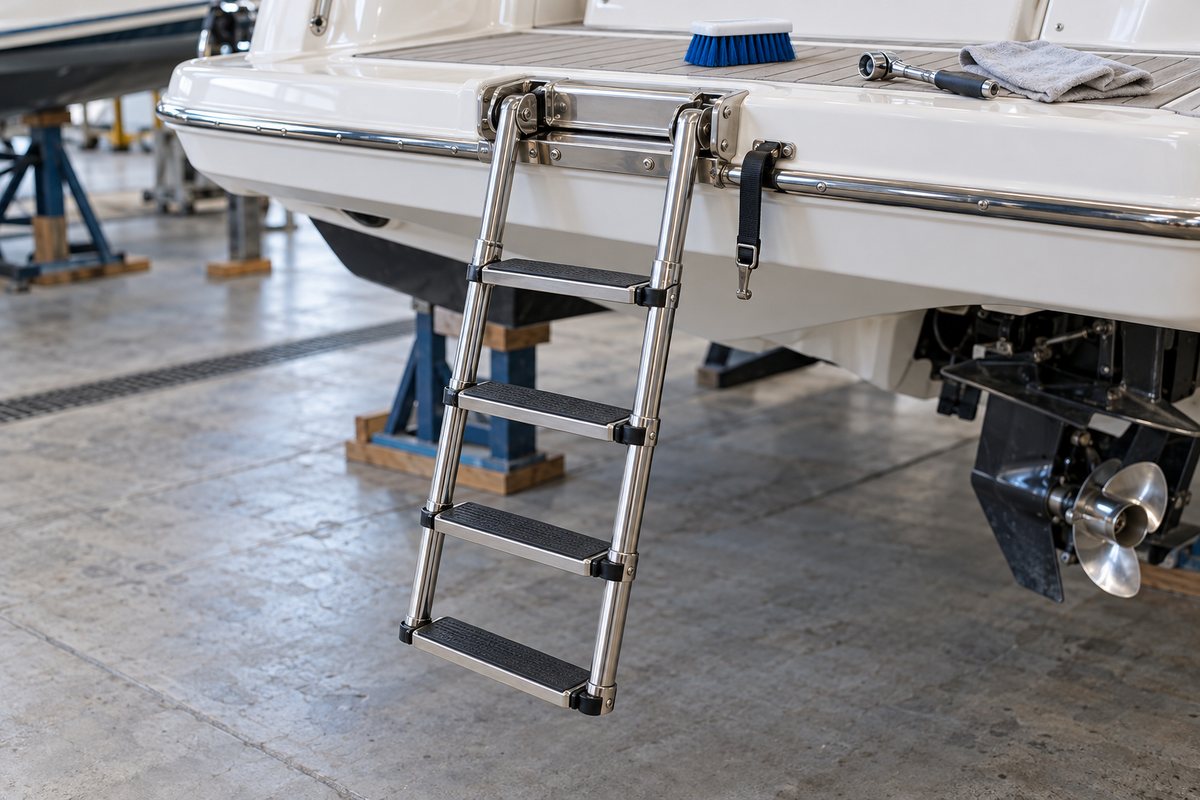
Identify the ladder before evaluating it
Start by documenting what is installed. Look for a manufacturer, model, part number, material, number of steps, and marked capacity. Note whether the ladder:
- Folds over the swim platform
- Telescopes vertically
- Slides from a shelf below the platform
- Pulls from a concealed transom tube
- Uses removable sockets or hooks
- Uses a spring-loaded pin, side latch, pin, strap, or bungee for retention
Do not infer a load rating from the number of steps or tube diameter. Even visually similar ladders can use different stainless alloys, mounting patterns, backing structures, and capacities. White Water Marine Hardware, for example, lists specific under-platform models built to stated requirements and ratings; those claims belong to those products, not to every stainless ladder.
Deploy the ladder exactly as a swimmer would
With the boat securely supported and the area below clear, release the ladder from the normal approach direction. If it is intended to be reachable from the water, verify that the release can actually be found and operated without standing on the platform.
Extend every telescoping section until it reaches its designed stop. Fold or pivot the ladder into its operating position without forcing it. Watch for:
- A latch that sticks or requires two hands
- Telescoping tubes that bind, twist, or stop short
- Steps that do not become level
- Hinges with excessive side play
- A ladder that contacts the hull, drive, trim tab, or platform edge
- Sharp pinch points or protruding fasteners
- Retention hardware that cannot be resecured after use
The ladder should move deliberately, but not require impacts or improvised leverage. A release that works only from on deck may not serve its emergency purpose.
Clean salt, sand, mud, and biological growth
Rinse the deployed ladder with fresh water, working from the mounting hardware down through each tube and tread. Use a soft nylon brush to remove grit from telescoping joints, hinge gaps, latch recesses, and the underside of nonslip steps. Avoid driving debris deeper with high-pressure spray.
Use cleaners compatible with the ladder's stainless steel, aluminum, plastic, rubber, and surrounding fiberglass. Chloride-rich cleaners, steel wool, carbon-steel brushes, and harsh abrasives can damage finishes or deposit particles that later appear as rust. White Water's installation guidance specifically cautions that carbon-steel tools can contaminate stainless hardware.
Rinse away cleaner and dry the ladder before inspecting polished surfaces. Brown staining does not automatically mean the entire part has failed, but recurring staining, deep pitting, cracks, or swelling around a joint requires closer evaluation.
Inspect every step and tread
Examine the top and underside of each step. Look for cracked plastic, torn rubber, missing tread material, polished slick areas, loose end caps, bent crossbars, and movement where a tread meets the rails.
Apply hand pressure to each step in several directions while the ladder remains unloaded. A step should not rotate, rattle, or separate from its brackets. Do not conduct a full body-weight test on a ladder with visible damage, unknown mounting, or unsupported boat structure.
Nonslip material must provide grip without concealing corrosion or cracks. Replace a damaged tread with the exact compatible part when available. Tape, rope, adhesive strips not intended for immersion, and sharp-edged homemade overlays can create new trip or cut hazards.
Inspect telescoping rails and stops
Check each rail for straightness, dents, flattening, cracks, and pitting. Telescoping tubes should extend and retract in alignment. A dent that seems cosmetic can interfere with nested sections, while a missing internal or external stop can allow a section to pull apart.
Operate the ladder several times after cleaning. If the manual allows lubrication, use only the specified product and amount. Many sliding stainless assemblies work best when clean rather than coated with sticky grease that collects grit. Do not spray a general penetrating oil onto treads, plastic bushings, or the water-facing area without manufacturer approval.
Inspect plastic guides, bushings, spacers, and collars for splitting or distortion. Metal-on-metal contact, bright wear marks, or gray debris can reveal a missing guide even when the ladder still moves.
Check hinges, pivots, pins, and latches
Folding and pivoting ladders concentrate load at their hinges. Inspect pivot bolts, clevis pins, retaining rings, washers, welds, and hinge plates. Hardware should be present, seated, and free from elongation around the holes.
Check the latch or spring-loaded pin in both positions. It must release when intended and retain the ladder when stowed. White Water's spring-loaded under-platform design, for example, uses a retaining feature in the bracket, while another model uses a side-mounted quick-release latch. The maintenance point is the same, but parts and adjustment are not interchangeable.
Replace a cracked bungee or weathered retention strap before storage. A ladder that deploys while underway can be damaged by water loads, strike the drive, or create a hazard. Do not rely on a temporary knot if the original system uses a latch or fitted strap.
Inspect mounting plates, brackets, and welds
Follow the ladder load path from the rails into the bracket and then into the boat. Look for:
- Bent or cracked mounting plates
- Loose bracket-to-ladder fasteners
- Cracks beside welds
- Pitting hidden behind hinges
- Elongated mounting holes
- Hardware with mismatched metals
- Rust streaks or white aluminum corrosion
- Movement between the bracket and platform
Use a bright light and mirror to view the underside. Surface hardware may look secure even when backing plates, washers, or nuts below have loosened.
Do not grind or polish a suspected structural crack until it has been evaluated. Removing evidence can make diagnosis harder, and cosmetic polishing does not restore strength.
Check the platform and backing structure
Grip the ladder near the mount and apply moderate alternating pressure without climbing it. Watch the surrounding fiberglass, aluminum, or wood. The structure should not flex independently, click, or open a gap around the bedding.
Inspect below the platform for backing plates, large washers, locking hardware, and sealed core. Warning signs include damp core, brown water tracks, crushed laminate, soft material, spider cracks, loose nuts, or fasteners turning with no resistance.
White Water's installation guide for one telescoping ladder calls for a flat mounting area, notes that additional reinforcement may be required, directs installers to seal exposed core, and beds the mounting surface with marine adhesive/sealant. Those details illustrate why a loose ladder is a structural and water-intrusion issue—not simply a matter of tightening visible screws.
If core damage or missing backing is found, remove the ladder from service until the platform is repaired. Tightening harder can crush the laminate and enlarge the failure.
Inspect bedding and water entry
Look closely at the bracket perimeter and each fastener. Failed bedding may appear as a gap, lifted edge, rust trail, dampness below, or movement that pumps water around a bolt.
Rebedding requires more than adding sealant around the outside. The hardware and bracket may need to be removed so the holes, core, and mating surfaces can be inspected and prepared. Use a sealant compatible with the boat material, ladder metal, and future service needs. Follow the boat builder and ladder manufacturer's installation procedure; permanent adhesive is not automatically appropriate.
After repair, confirm that drainage paths beneath an under-platform ladder remain open and that excess sealant does not jam a slide or latch.
Examine clearances around the drive and hull
Deploy the ladder while the sterndrive, outboard, swim step, platform extension, and trim tabs are in relevant positions. Ensure the ladder cannot contact moving propulsion equipment or sharp underwater hardware.
Never test a ladder near a running engine. Reboarding should occur only with propulsion shut down and secured. A ladder beside an outboard may also need enough clearance for the engine's steering and trim envelope when stowed.
For a concealed ladder, inspect the tube or pocket for standing water, debris, cracks, and a blocked drain. A ladder stored wet inside a closed tube can corrode where it is hardest to see.
Verify stowage before winter
Retract and stow the ladder several times. Confirm that every section nests completely and that the latch, pin, strap, or bungee holds it without excessive tension. The stowed assembly should not rattle, rub the hull, trap the boat cover, or collect standing water.
If the manufacturer recommends removal for storage, label fasteners and spacers, protect the mounting holes, and keep parts together. Do not wrap a damp ladder in airtight plastic. Drying, ventilation, and separation from corrosive chemicals are more useful than sealing moisture inside.
Tag a disabled ladder clearly. Anyone working aboard during storage should know it cannot be trusted as a step or access point.
Boat boarding-ladder maintenance checklist
- Manufacturer, model, material, step count, and rated capacity are recorded
- Ladder can be released from its intended approach direction
- Every section fully deploys, aligns, and reaches its stop
- Treads are secure, nonslip, and free of cracks
- Rails are straight and free of dents, deep pitting, and cracks
- Guides, collars, bushings, and stops are present and sound
- Hinges, pivots, pins, and welds have no looseness or damage
- Latch, strap, pin, or bungee secures the ladder when stowed
- Mounting plates and fasteners show no movement or corrosion
- Backing plates, washers, nuts, and supporting structure are sound
- Bedding and sealed core show no leak or moisture clues
- Deployed and stowed clearances protect the hull and propulsion gear
- Ladder is dry, secured, and documented for winter storage
Record the service in BoatDuty
Record the inspection date, ladder manufacturer and model, material, step count, stated capacity, mounting hardware, cleaning products, latch or strap condition, and any repair. Note whether the ladder can be deployed from the water and whether the backing structure was inspected. A clear BoatDuty service history helps track recurring binding, corrosion, bedding failure, or replacement parts before the ladder is needed in an emergency.
Sources
- White Water Marine Hardware, AM1504PL Telescoping Dive Ladder Installation Guide (reinforcement, sealed core, bedding, and stainless-tool contamination guidance)
- White Water Marine Hardware, Stainless Steel Under-Platform Ladder, Spring Loaded (model-specific retention design and stated rating)
- White Water Marine Hardware, Under-Platform Shelved Telescoping Ladder (extension, retraction, and retention-strap design)
- White Water Marine Hardware, Under-Platform Ladder with Stainless Quick-Release Latch (model-specific release and stowage operation)