

A dependable bilge-pump system is easy to overlook because most of its work happens out of sight. Before storage—or any time the boat has been sitting—give the pump, automatic switch, wiring, fuse, hose, and discharge fitting a deliberate inspection. Boat bilge-pump and float-switch maintenance does not replace leak prevention or emergency damage control, but it can expose a blocked intake, seized switch, weak connection, or restricted hose before the next heavy rain or launch day.
Bilge systems vary. Some boats have one small pump, while others have multiple pumps, electronic water sensors, high-water alarms, or separate manual and automatic circuits. Use this checklist as a structured inspection, then follow the pump maker’s instructions and the boat’s wiring diagram for model-specific test methods, fuse sizes, hose routing, and replacement parts.
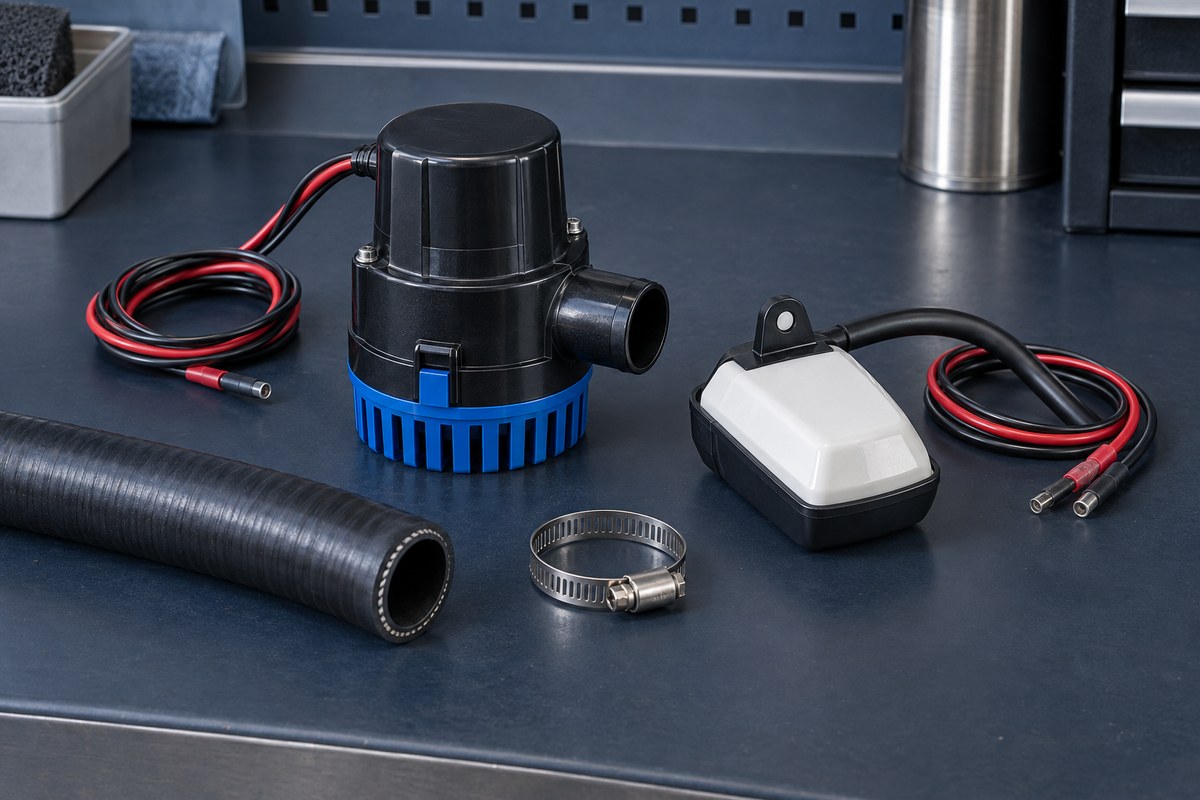
Start with a safe, clean bilge
Secure shore power as appropriate, turn off engines and ignition sources, and ventilate the compartment before working. If fuel odor is present, stop immediately: do not operate switches or make electrical connections until the source is found and the space is made safe. Keep oil, fuel, coolant, and contaminated bilge water out of drains and waterways; collect and dispose of them according to local rules.
Remove loose debris before it reaches the pump. Leaves, cable ties, bits of sealant, hair, and sediment can obstruct an intake screen or keep a mechanical float from moving freely. Wipe around the pump base and switch without using a solvent that could attack plastic or insulation. A recurring accumulation of clean water still deserves investigation—trace rainwater, plumbing, stuffing-box, drain, or fitting leaks instead of asking the pump to conceal them.
Inspect the pump and intake screen
Check that the pump and its strainer or mounting base are secure. A pump that has broken loose may tip, move away from the lowest collection point, or strain its wiring and hose. Release the pump from its base only as the manufacturer directs. Clear the screen and inspect the impeller area for debris, cracking, swelling, or damage; never force a jammed impeller with power applied.
Look for heat discoloration, a distorted housing, unusual noise, or evidence that the motor has run dry for long periods. Confirm that the pump capacity, outlet size, and installation orientation still match the boat’s design. If replacement is needed, do not assume that a physically similar pump is an equivalent substitute. Flow ratings are established under specified conditions, and real installed output is affected by vertical lift, hose length, bends, voltage drop, and restrictions.
Test the automatic float switch or water sensor
For a traditional float switch, confirm that the float travels through its full range without rubbing a hose, wire, bulkhead, or stored gear. Use the manufacturer’s test lever or lift method if one is provided. The pump should start promptly and stop when the switch returns; a sticky or intermittent response calls for diagnosis, not repeated cycling.
Electronic switches and pumps with integrated sensors may use timed sampling, field-effect sensing, or another design. Test them only by the procedure in their instructions—lifting an imaginary float proves nothing. If the maker permits a controlled water test, add clean water while watching the level at which the system starts and stops. Never leave a test hose running unattended, and remove the test water afterward.
A dashboard “manual” switch does not prove that the automatic feed works. Test each operating mode separately. Likewise, an illuminated panel lamp is not proof of adequate flow at the discharge.
Examine wiring, fuse protection, and battery supply
Inspect accessible conductors from pump and switch toward the distribution point. Look for green corrosion, darkened copper, swollen insulation, unsupported splices, chafe, and terminals located where normal bilge water can cover them. Bilge wiring should use marine-suitable components and sealed connections appropriate to the wet location. Do not bury a questionable splice under fresh tape.
Confirm the fuse or circuit breaker type and rating against the current pump manual and the boat’s documentation. Never install a larger fuse to stop nuisance failures; repeated opening indicates a fault, obstruction, damaged motor, undersized conductor, or another condition that needs correction. Automatic operation is often supplied by an unswitched battery circuit, so verify how your boat is arranged before switching off the battery selector for storage.
If you measure voltage, test while the pump is running, because an unloaded circuit can appear healthy despite resistance in a corroded connection. Compare readings and allowable voltage drop with the equipment instructions or have a qualified marine electrician evaluate the circuit.
Follow the discharge hose to the hull fitting
Trace the hose from pump to discharge. It should be the specified internal diameter, supported, and free of kinks, collapsed sections, low pockets that create avoidable resistance, and abrasion. Check every clamp and fitting for security and corrosion. Replace a hardened, split, or oil-softened hose with material suitable for the application.
Confirm that routing protects against backflow or siphoning as designed. Depending on the boat, that may involve a high loop, vented loop, check valve, or another arrangement. Do not add a check valve simply because water returns after shutdown: some pump manufacturers warn that extra restriction can reduce performance or trap debris. Follow the boatbuilder’s design and pump instructions, and have questionable below-waterline routing reviewed by a qualified technician.
At the exterior outlet, make sure the fitting is unobstructed and undamaged. During a controlled test, observe a steady discharge and inspect all accessible hose joints for leaks.
Complete a functional test
Use this sequence where it agrees with the equipment manuals:
- Clean the bilge and intake screen.
- Confirm that the pump, switch, wiring, hose, and clamps are secure.
- Test manual operation and observe discharge.
- Test automatic operation by the manufacturer’s approved method.
- Verify that the pump stops correctly and does not short-cycle.
- Test a high-water alarm separately, if fitted.
- Restore every switch, fuse, battery selector, and access panel to its intended state.
Do not rely on sound alone. Watch the water level, discharge stream, hose joints, and shutdown behavior. If the pump runs but moves little water, look for an intake blockage, air leak, restricted hose, excessive lift, low operating voltage, or a damaged impeller.
Record the inspection in BoatDuty
Log the inspection date, engine or boat hours if relevant, pump and switch model numbers, fuse rating, hose size, test result, and any parts replaced. Note the water source if you found one, along with corrective work and a follow-up date. A short BoatDuty entry turns an easy-to-forget test into a useful history: repeated debris, slower discharge, increasing run time, or recurring water can then be recognized as a pattern instead of an isolated surprise.
Finish by leaving the bilge clean, the automatic system configured as the boatbuilder intends, and access clear. The best fall bilge-pump inspection is not the one that merely makes the motor run—it is the one that confirms the complete path from water at the intake to water safely outside the hull.