

A fall boat anode inspection gives you a useful snapshot of the season below the waterline. Before the boat disappears under a cover, check the sacrificial anodes, identify the correct replacements, and record their condition. The goal is more useful than simply making a shopping list: you want to know which parts were inspected, what changed, and whether anything needs professional attention before the next launch.
This guide focuses on accessible external sacrificial anodes. Boats differ considerably, and not every boat has the same locations or corrosion-protection system. Internal engine anodes and powered corrosion-control equipment require their own instructions. Follow the boat, engine, drive, and anode manufacturers’ guidance for the installed equipment.
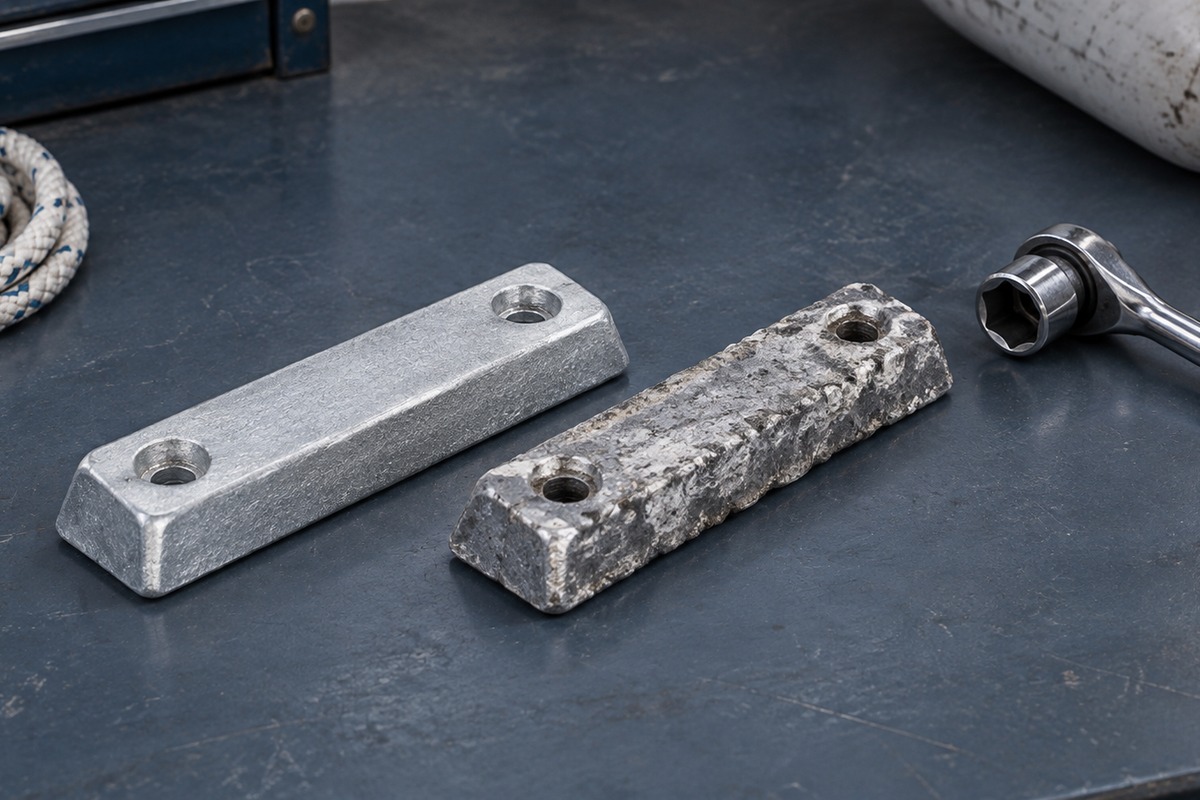
Understand what anode wear means
Sacrificial anodes are intended to corrode preferentially to help protect other metal components. Some material loss is therefore expected; a rough-looking anode is not automatically evidence of a defective product. Yamaha recommends replacing its outboard anodes when approximately half the material is gone and using factory-recommended replacements. Treat that as the manufacturer’s guidance, not a reason to disregard a different replacement limit in your own manual. Yamaha corrosion-prevention guidance
Before removing anything, take a clear reference photograph. Include enough of the surrounding equipment to identify the location later. “Starboard engine bracket” is much more useful in a service record than “rear anode.” If an area cannot be inspected safely, list it as uninspected rather than counting it as satisfactory.
Build an anode list for the equipment actually installed
Use the applicable parts diagram to make a location-by-location list. Record the engine or drive model and serial number alongside each replacement part number. On a twin-engine boat, identify port and starboard separately even when the equipment appears identical.
Do not rely on the previous owner’s receipt as the only proof of compatibility. Mercury’s anode catalog distinguishes applications and alloys, including separate aluminum and magnesium kits for particular engines. A similar shape or familiar brand name does not establish the correct selection. Mercury anodes and anode kits
One specific example illustrates why details matter: Mercury lists aluminum anode 31640T4 for selected Mercury/Mariner outboards and MerCruiser applications, but expressly excludes Bravo drives. The same listing identifies both fresh- and saltwater applications. Use that information only for that part; it is not a universal alloy-selection chart. Mercury 31640T4 application information
Tell the supplier where the boat operates and whether that will change next season. Ask for confirmation against the equipment identification before substituting a different alloy or kit.
Inspect the surface without hiding the evidence
Note remaining material, uneven loss, loose or missing pieces, and anything covering the anode. Yamaha warns against painting or covering anodes because they need water contact, and explains that organic growth can interfere with their function. Its washdown guidance calls for cleaning that growth with a brush and soap. Use the cleaning method appropriate to your equipment rather than treating the anode like surrounding painted surfaces. Yamaha anode care
Keep observations separate from conclusions. “More material missing than in the June photograph” is an observation. “The neighboring boat caused it” is a diagnosis that the photograph cannot establish. If the change concerns you, provide the dates, locations, operating-water history, and previous part details to a qualified marine technician.
Make replacement a documented job
Before work begins, confirm safe access and the required engine or drive isolation and support procedures. Do not work beneath unsupported equipment. Have a service professional handle locations that require unsafe access or procedures beyond your experience.
Follow the applicable instructions for removal, mounting-surface preparation, hardware, and tightening. This article intentionally does not provide a generic torque or compound recommendation: a value or treatment borrowed from another assembly is not a verified specification for yours.
Keep each new part’s identification until the installation is recorded. If a shop performs the work, request the locations serviced and part numbers on the invoice. A kit purchase alone does not tell you that every intended location was addressed.
Finish with a short fall anode checklist
- Every listed location marked inspected, serviced, or still outstanding.
- Replacement criteria checked against the relevant manual.
- Correct application and alloy confirmed before ordering.
- Before-and-after condition recorded where replacement occurred.
- Unusual findings referred for evaluation without guessing their cause.
- A follow-up inspection planned under the equipment’s maintenance guidance.
Use BoatDuty to keep the inspection date, anode locations, part numbers, alloy information, and repair notes together. Add engine hours when they help connect the work to the broader service history, but also record the dates the boat was in the water. A useful note explains both the work completed and anything still unresolved. Next season, that record gives you a starting point for comparison instead of another attempt to remember what the old anodes looked like.